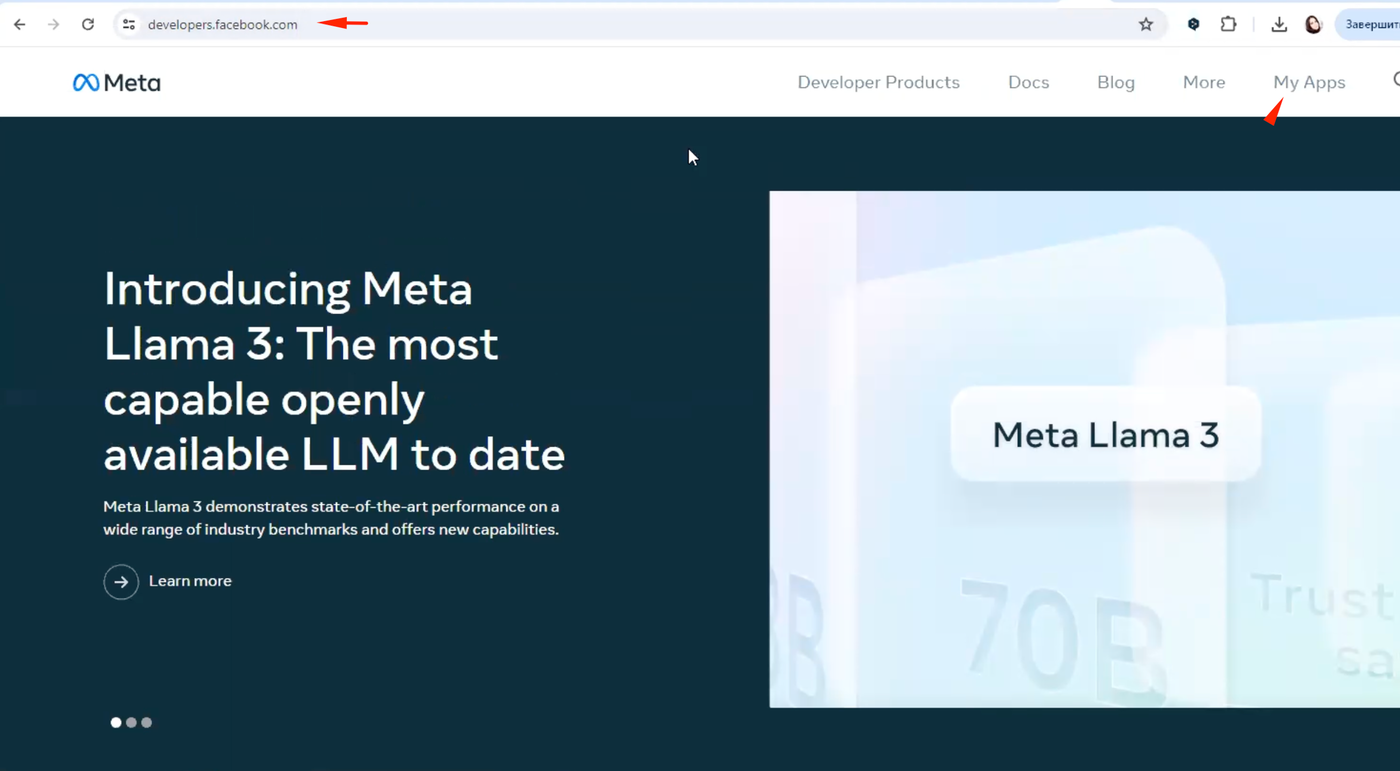
To connect WhatsApp Bot, you need to have a Facebook business account. Authorize in it. On https://developers.facebook.com go to My Apps section and click Create.
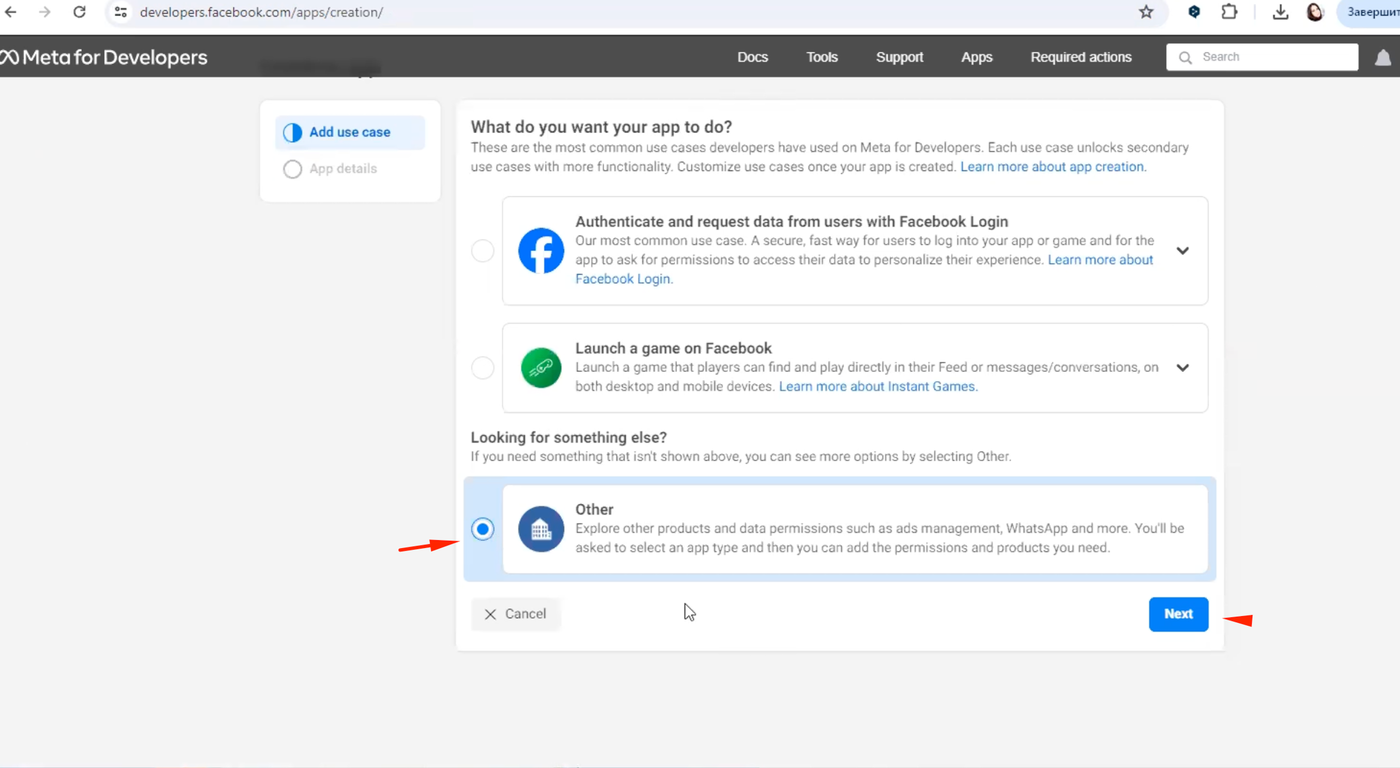
Select Other
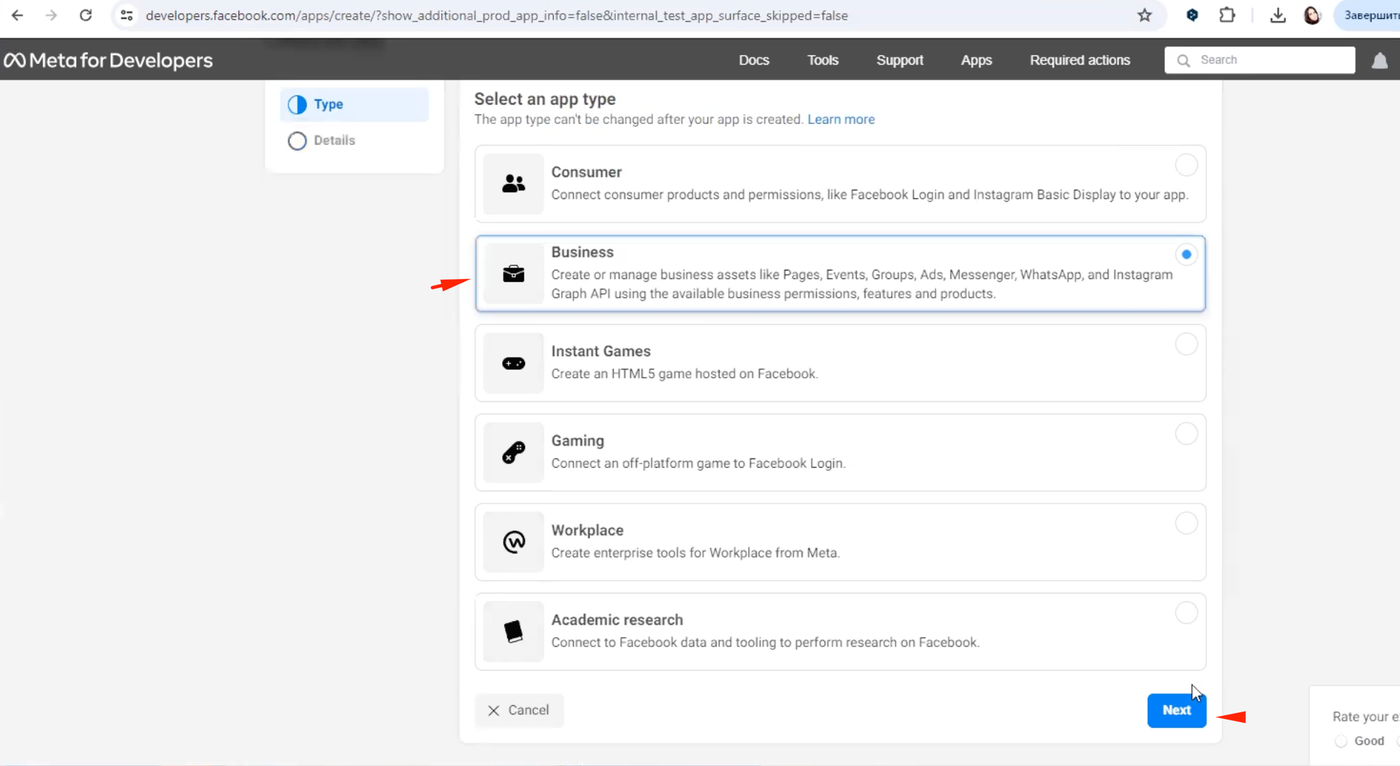
On the next page select Business
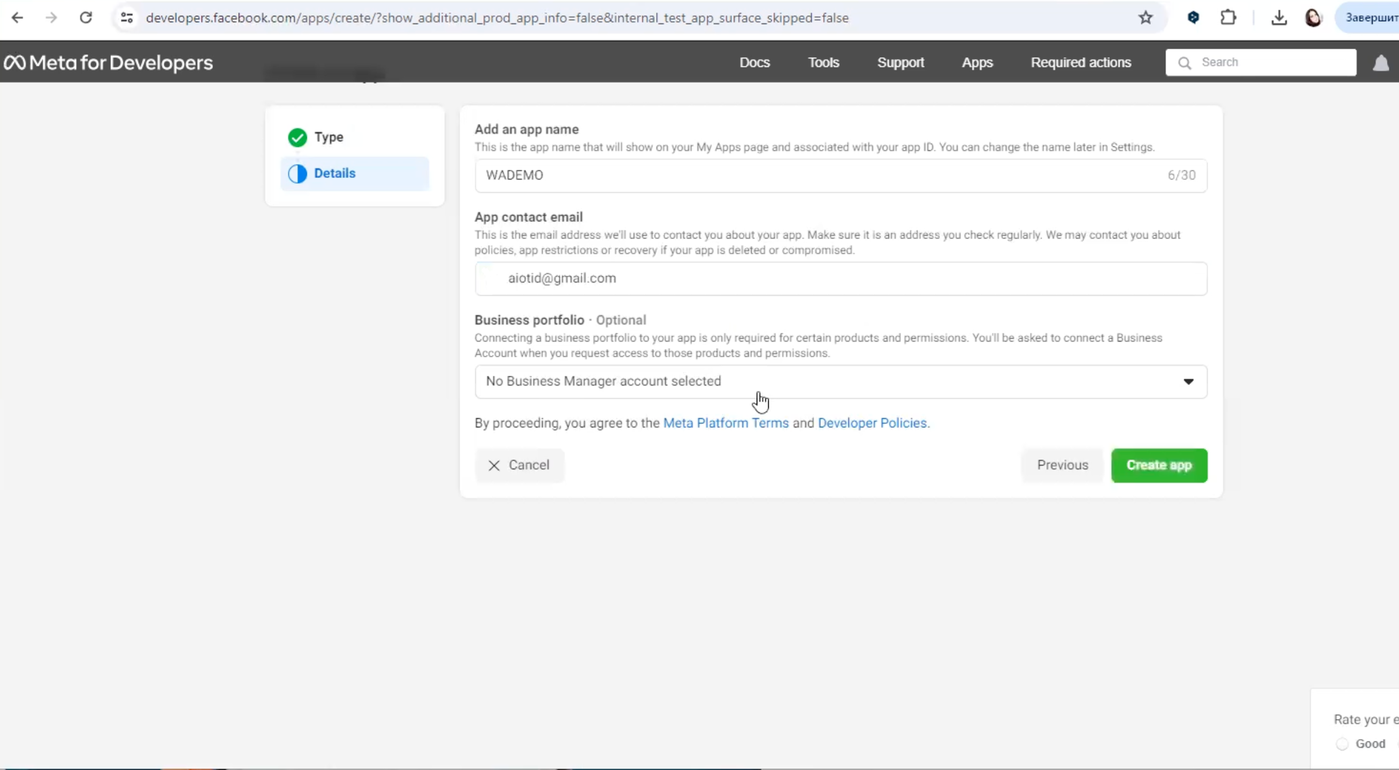
Next, add your Application Name, email, select or create a business manager.
On the next page, find the WhatsApp and click Set up.

Next, select the Business profile.
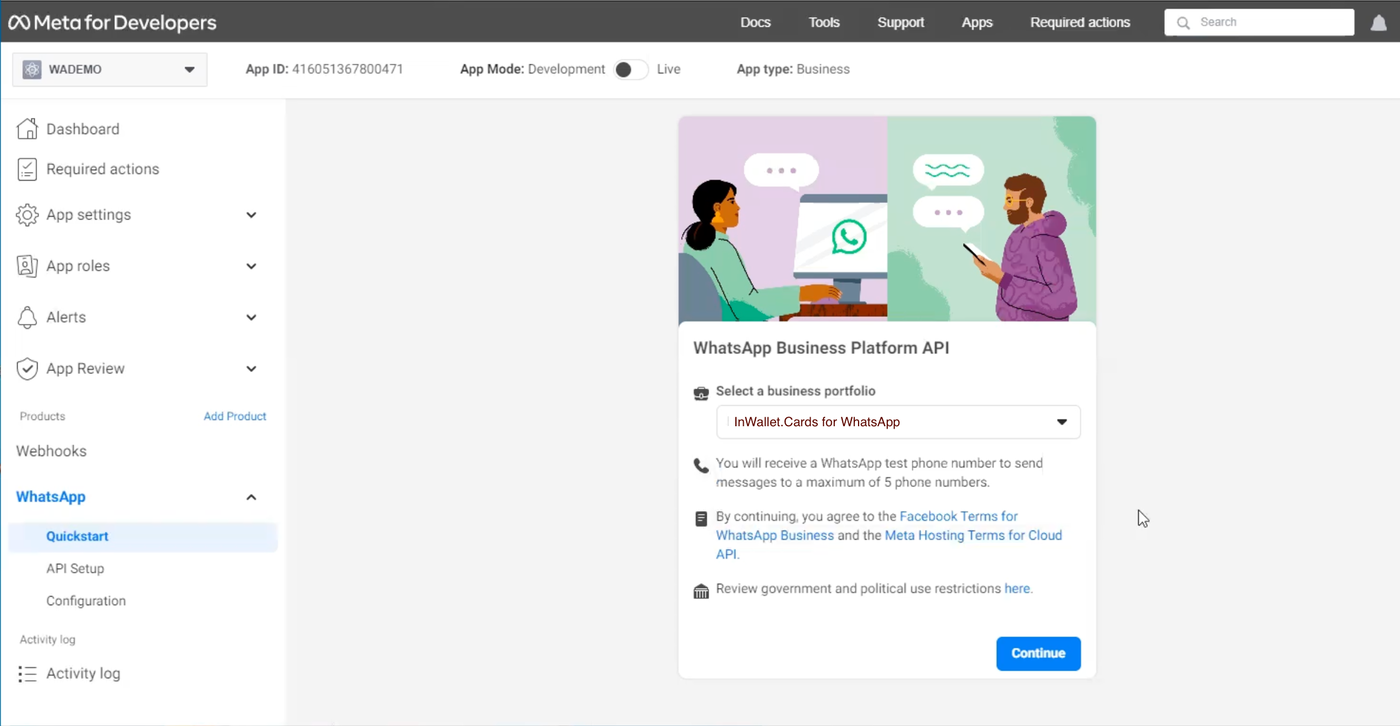
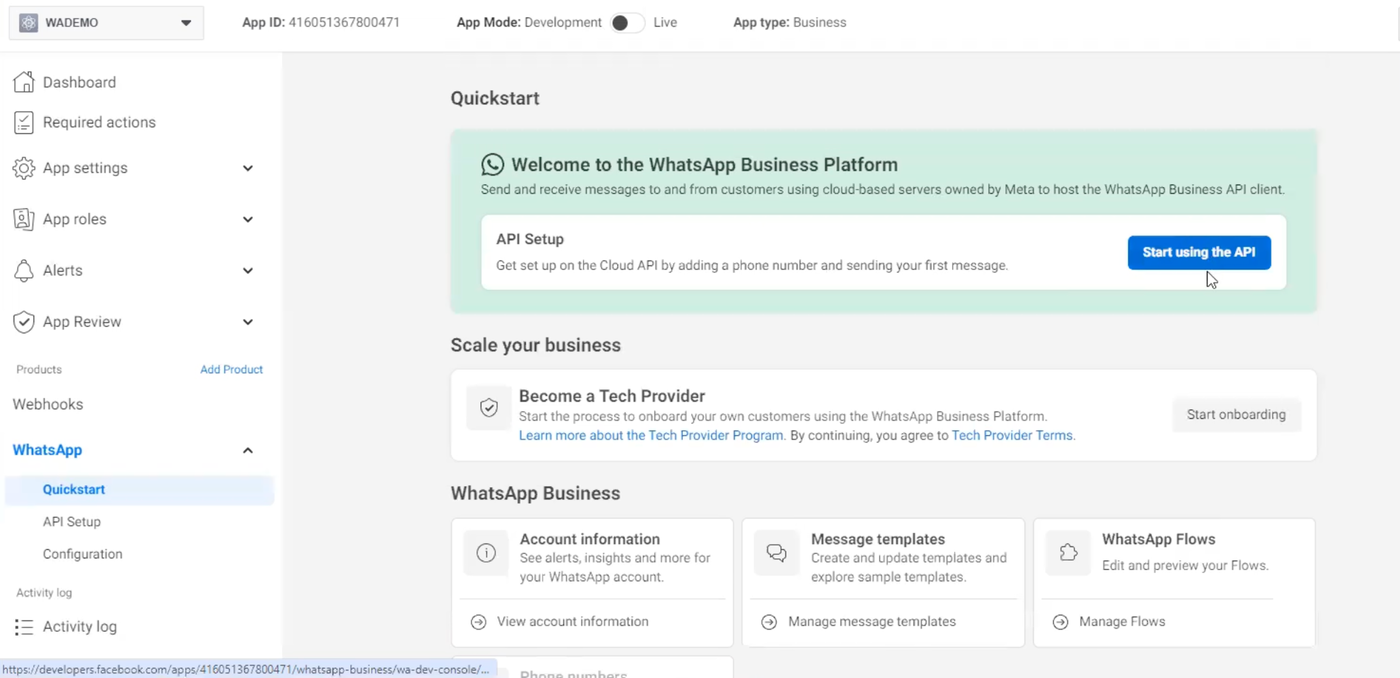
Next, click Start Using the API.
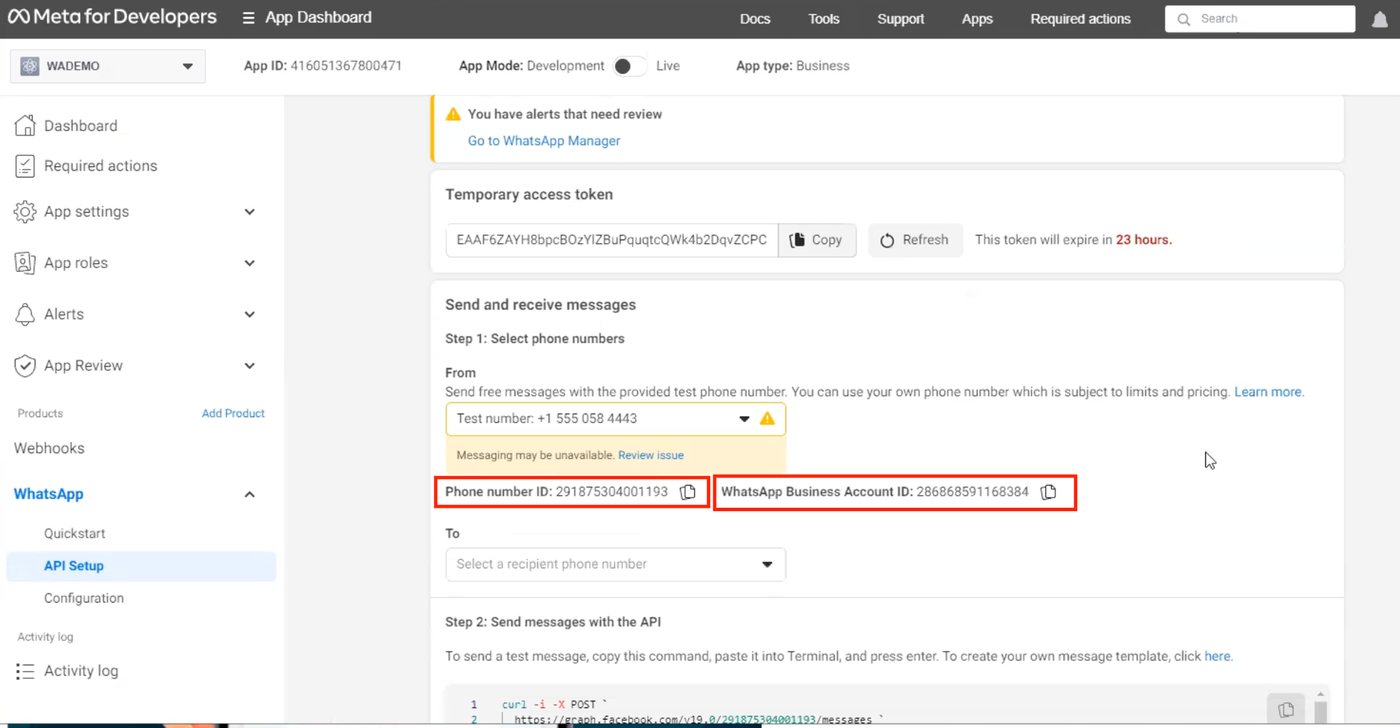
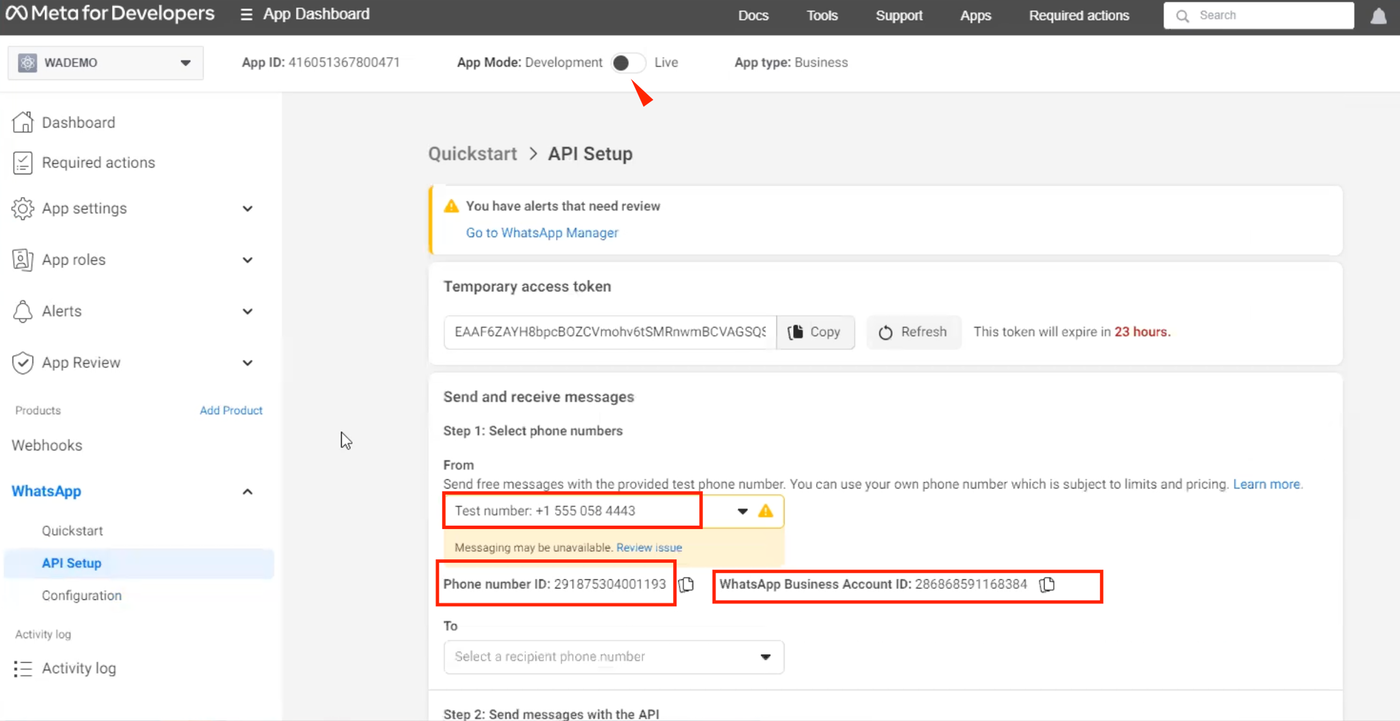
You need to add the phone number from which you want to send messages to WhatsApp.
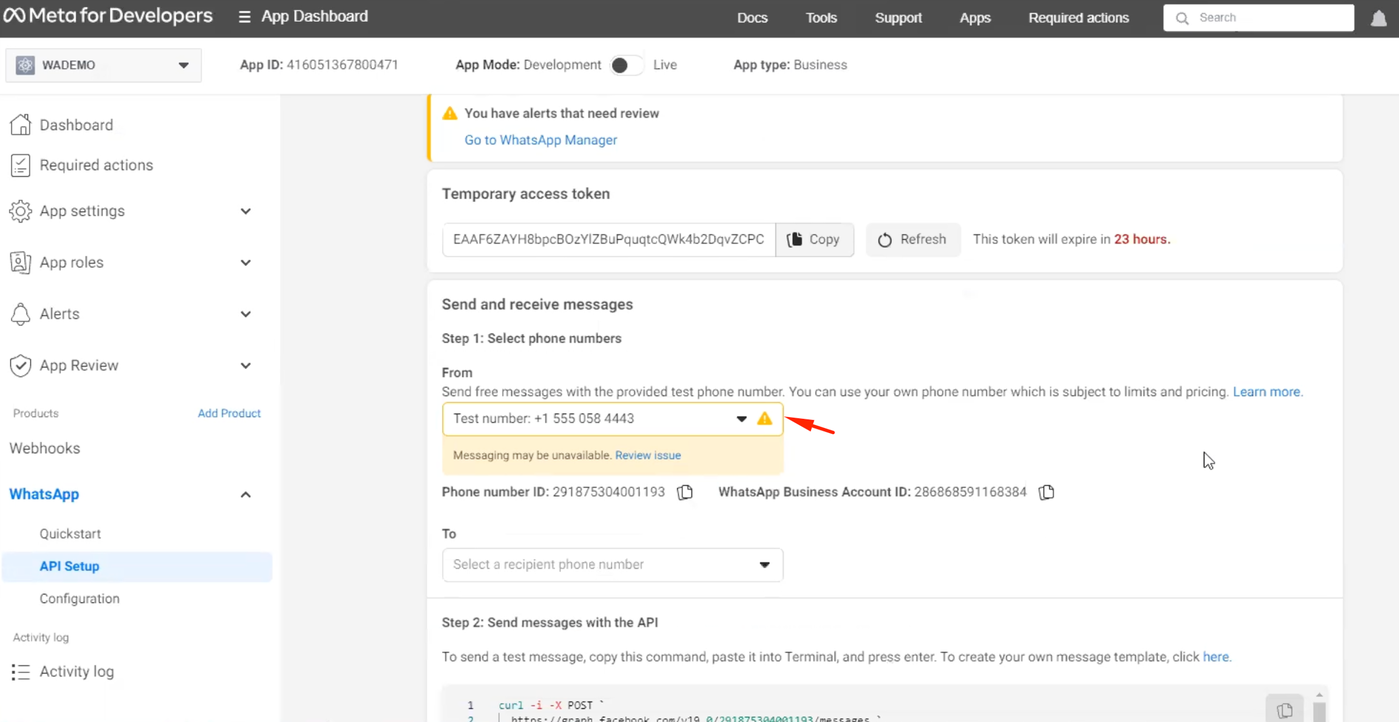
You can write a test phone number and check the sending of the message.
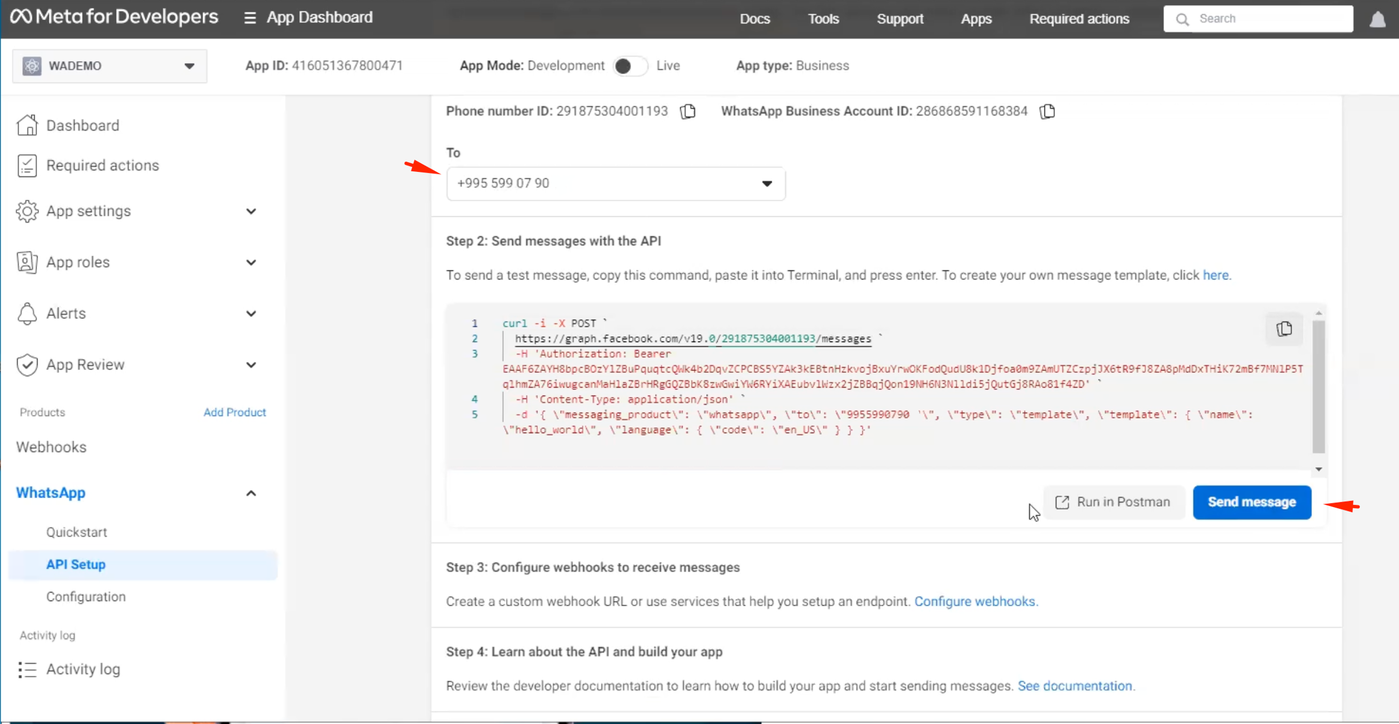
Phone number ID, WhatsApp Business account ID are also listed on this page. These data are needed to connect WhatsApp Bot in InWallet.Cards account.
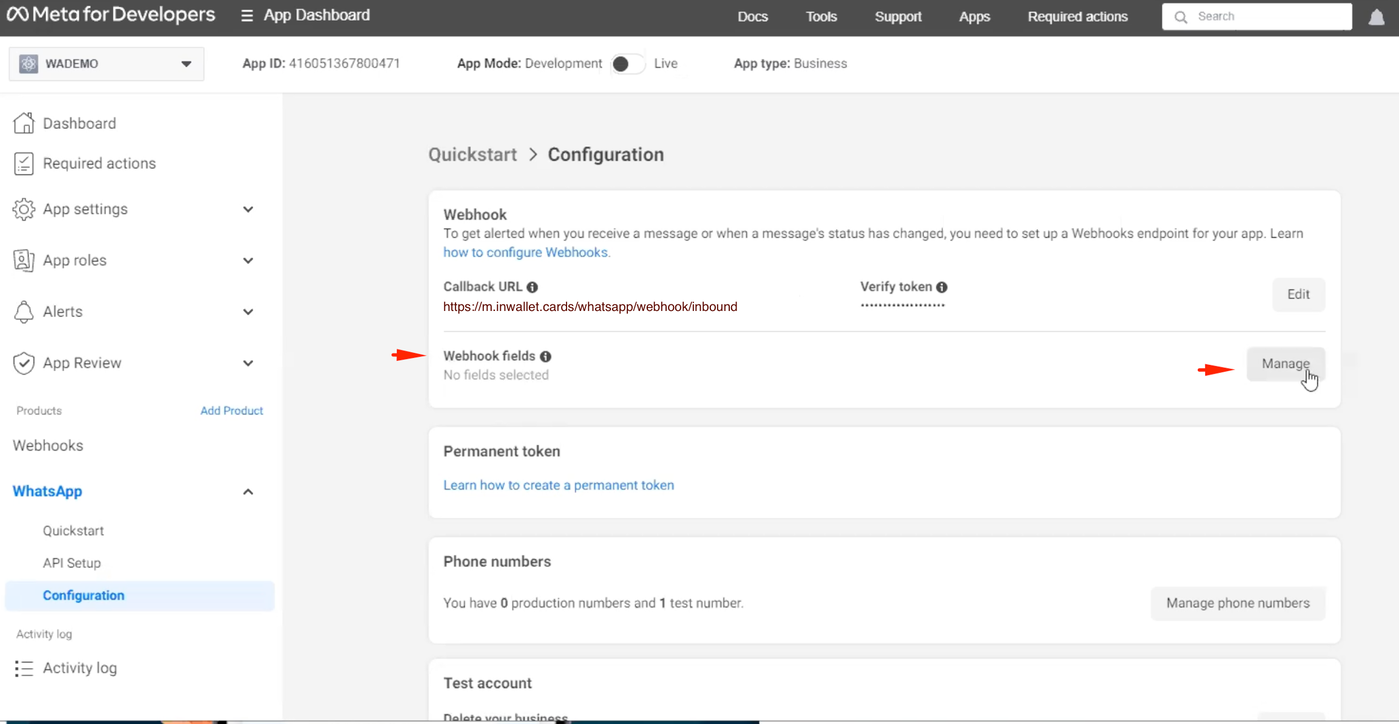
Next, we configure the webhooks.
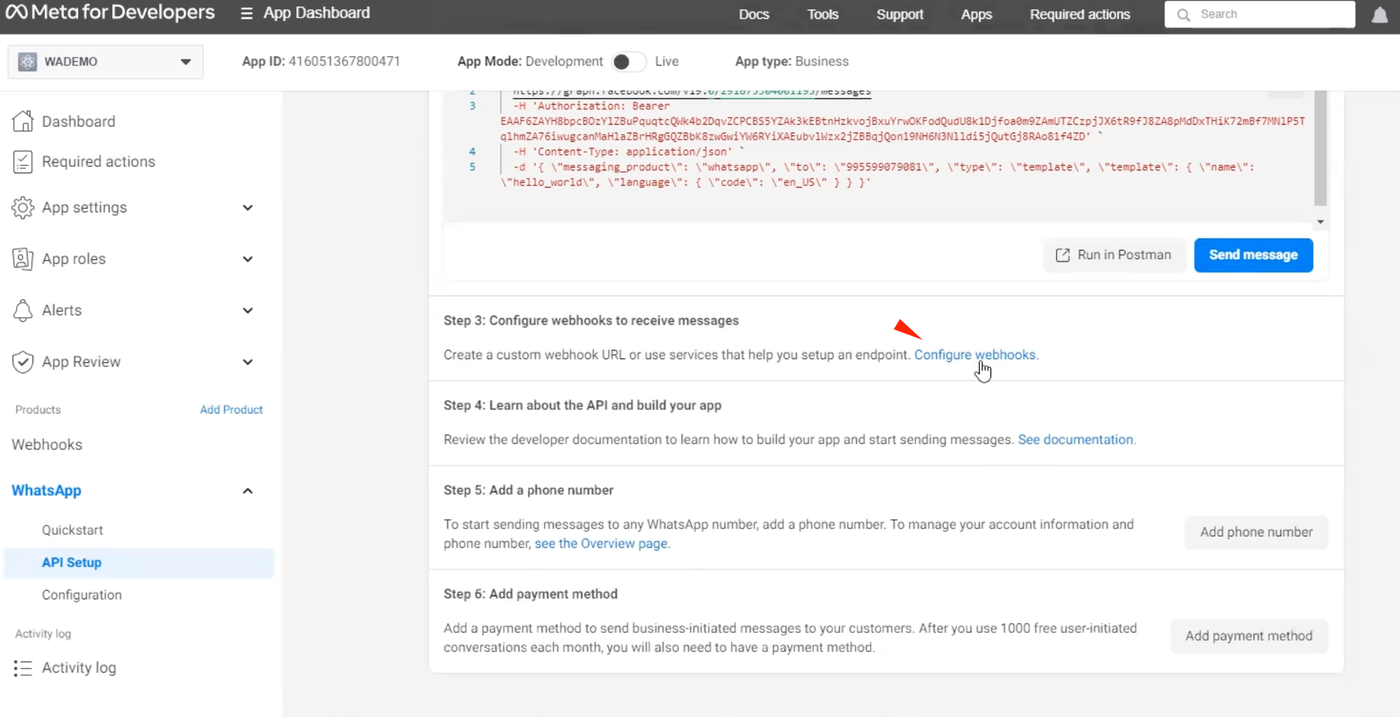
Clicks Callback URL - Edit
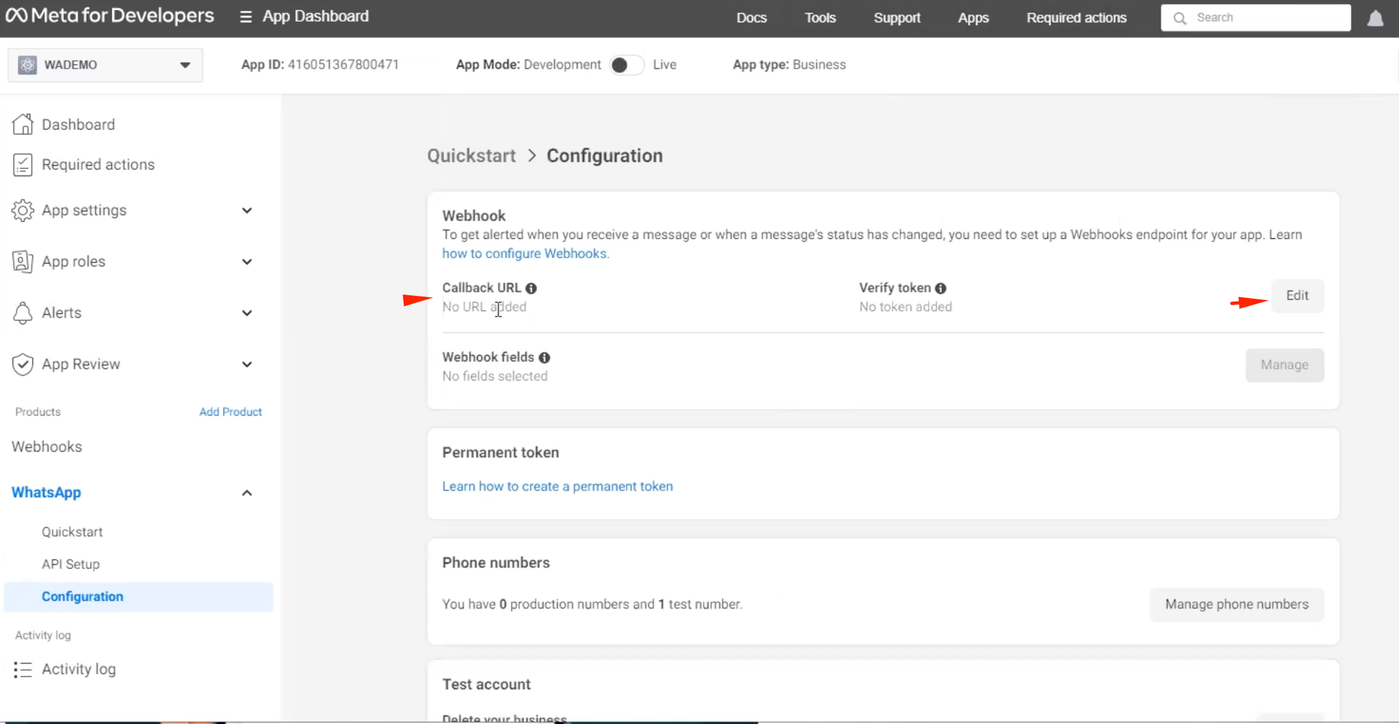
Fill in:
Callback URL: https://mailing.inwallet.cards/whatsapp/webhook/inbound
Verify token: whatsapp_bot_webhook_verify_token
Click Verify and save.

Next, select Webhooks - Manage
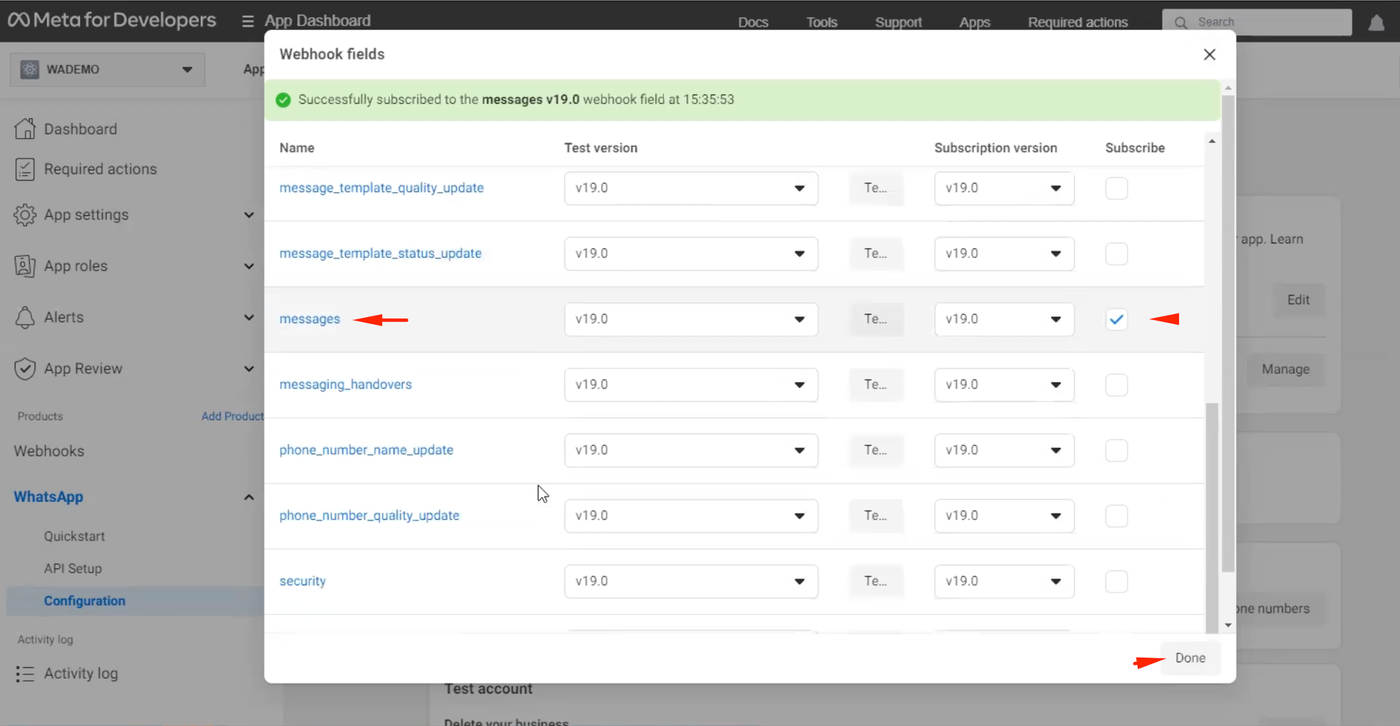
Find Messages in the list and enable it. Click Done
The next step is to configure the permanent token. You can find more information at https://developers.facebook.com/docs/whatsapp/business-management-api/get-started#1--acquire-an-access-token-using-a-system-user-or-facebook-login.
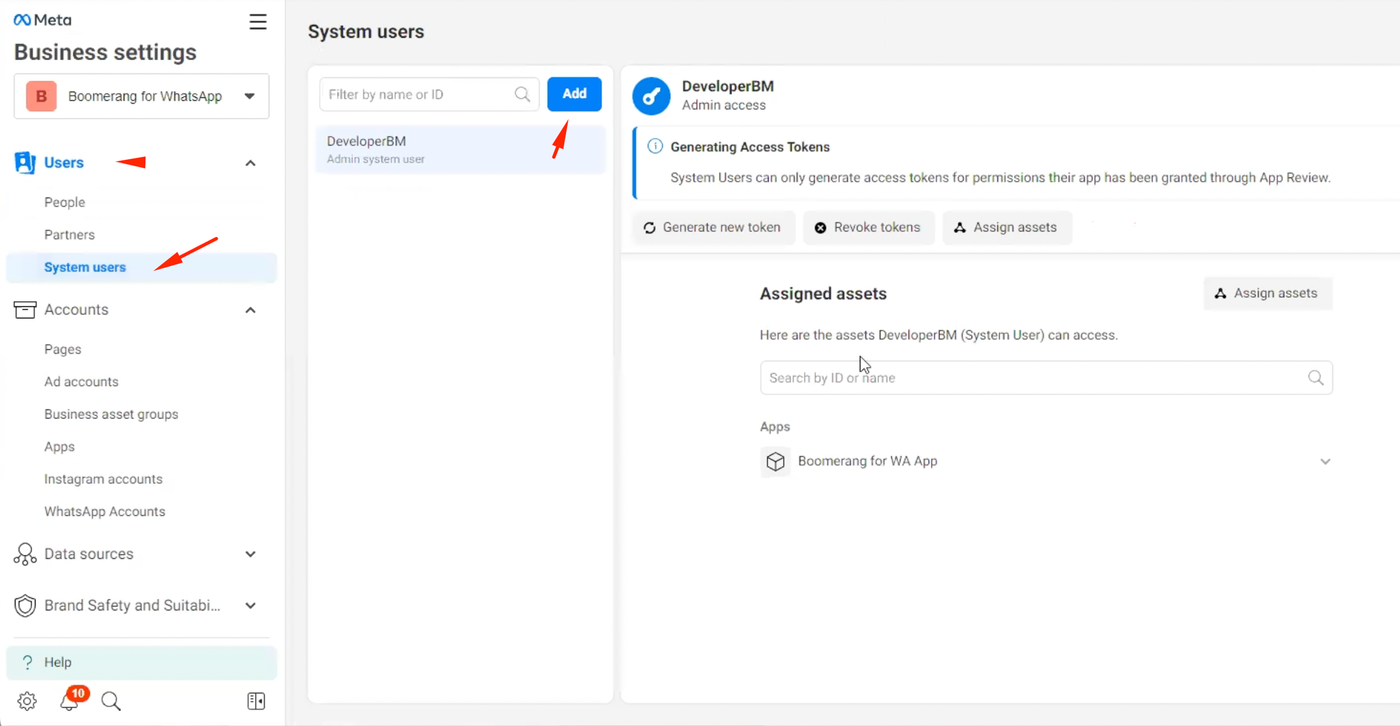
To do this, you need to select a business manager: go to https://business.facebook.com/settings/people.
Select the Business Manager you specified in the settings earlier.
Go to Users -> System Users and click Add (create a user: enter a name and select the Admin role).
Next, click Generate new token, select our application, select Token expiration "Never", enable:
business_management
catalog_management
whatsapp_business_management
whatsapp_business_messaging
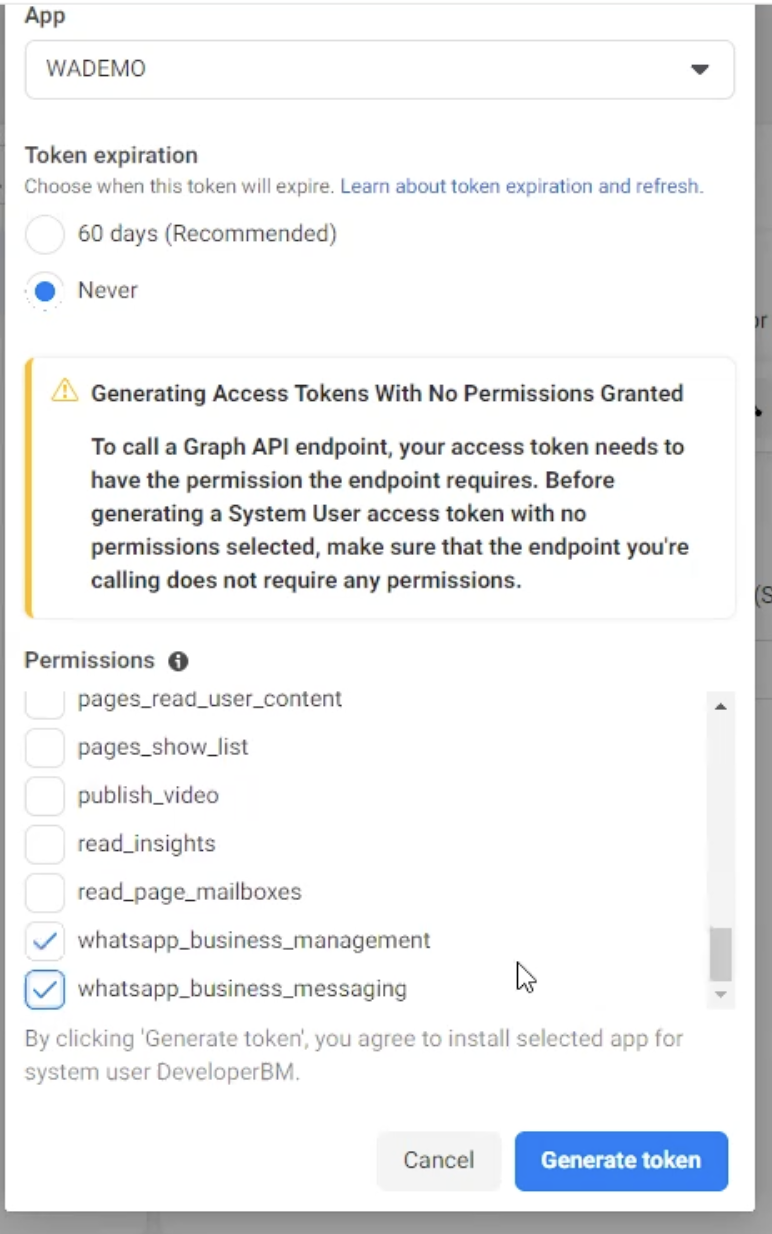
Click Generate token. Save the generated token.
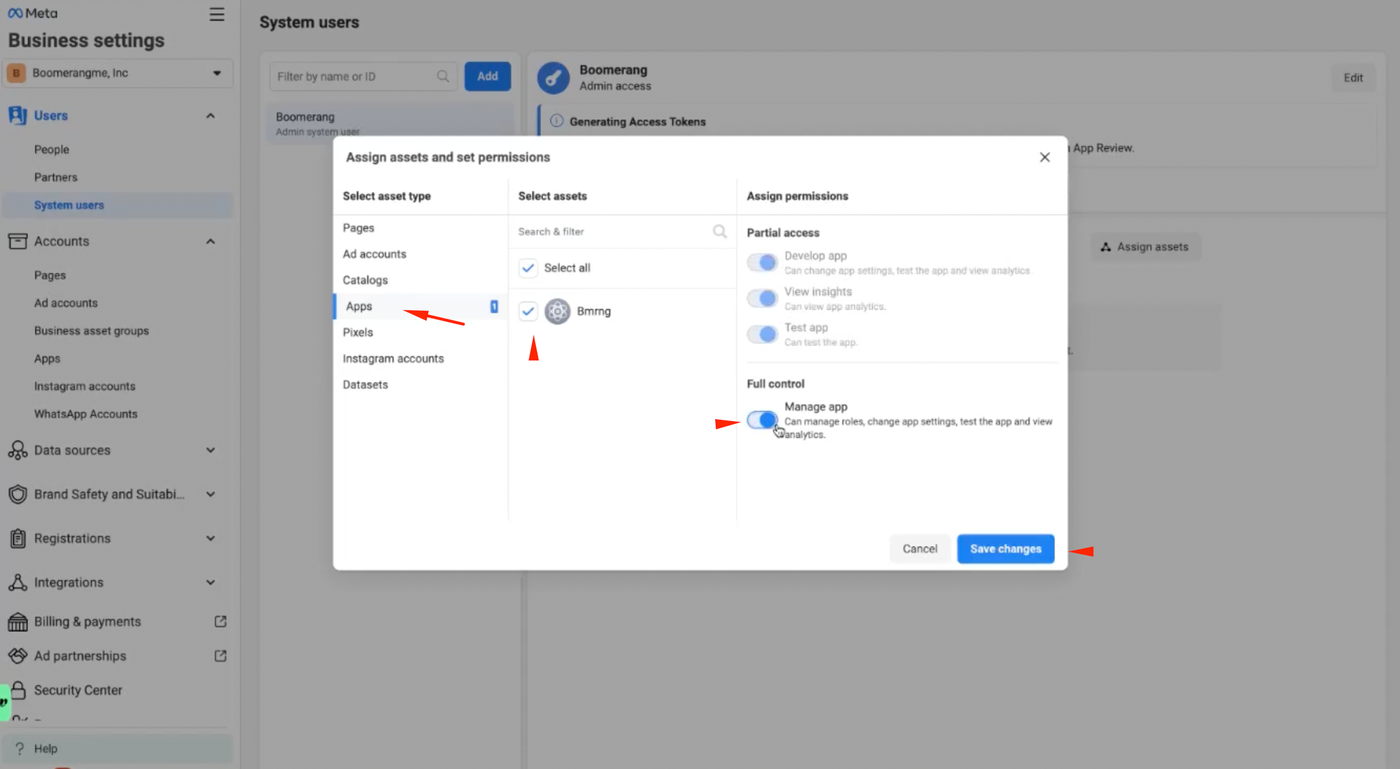
You also need to go to Assign assets -> Apps and enable Manage app.
Go back to the business account dashboard and enable Live mode. You can also save the data on the screenshot to connect the WhatsApp bot.
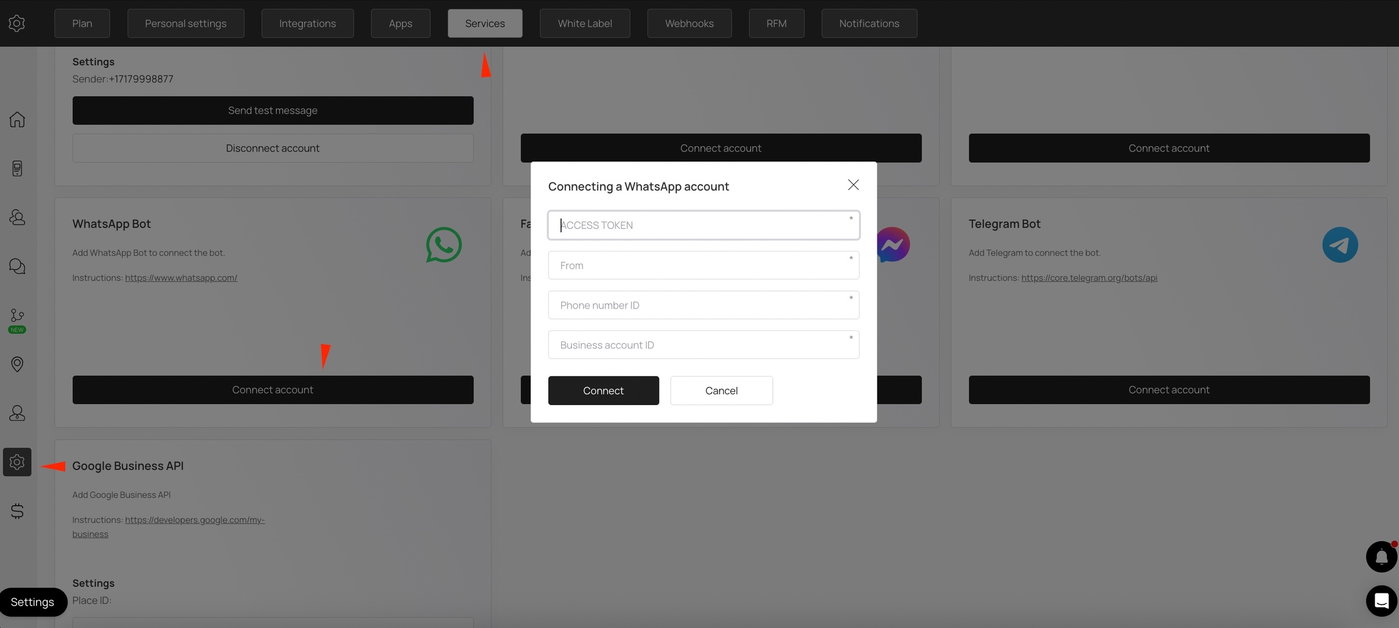
Now connect WhatsApp Bot in your InWallet.Cards account. Go to the mailing list section -> settings https://app.inwallet.cards/mailings/settings.
Click connect WhatsApp Bot, enter the token you saved above, sender's phone number, Phone number ID, WhatsApp Business account ID.
✅ Please note that this is only for loyalty cards. That is, with sub-accounts, you will not be able to set up communication via WhatsApp.
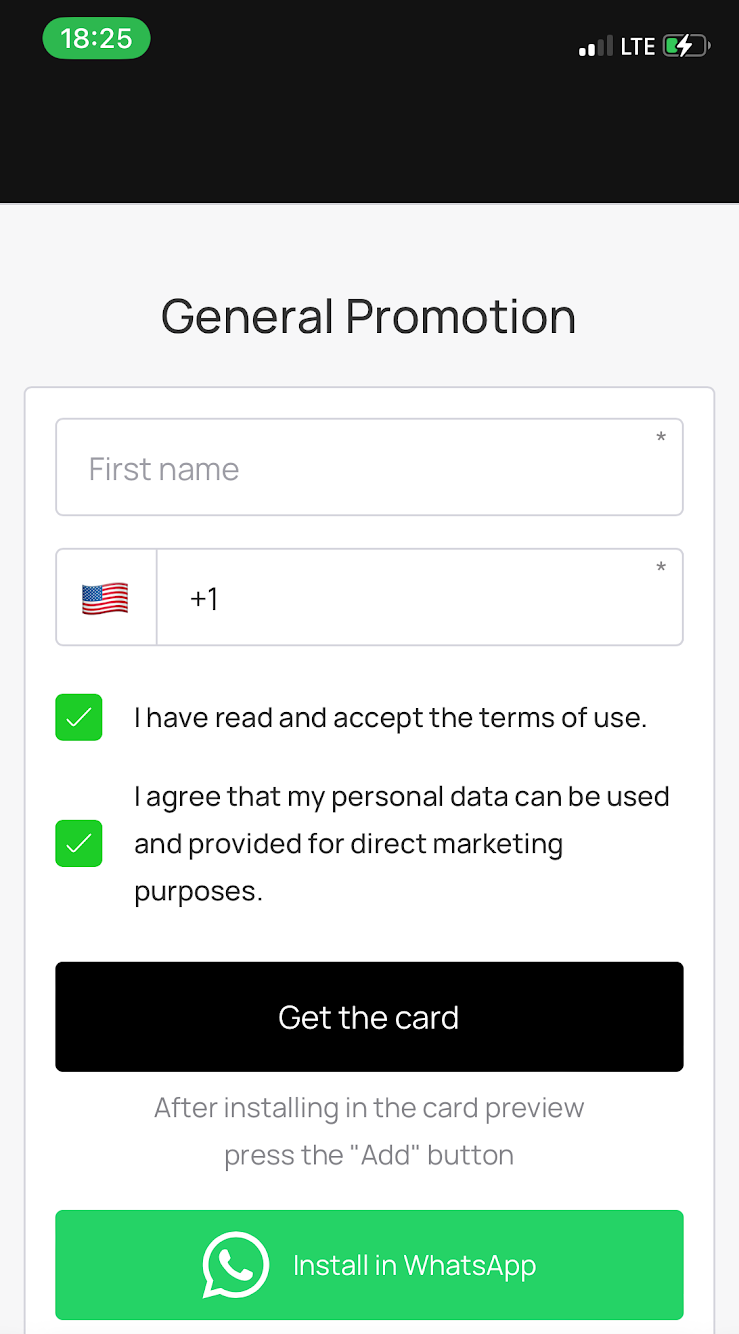
How to install a card in WhatsApp
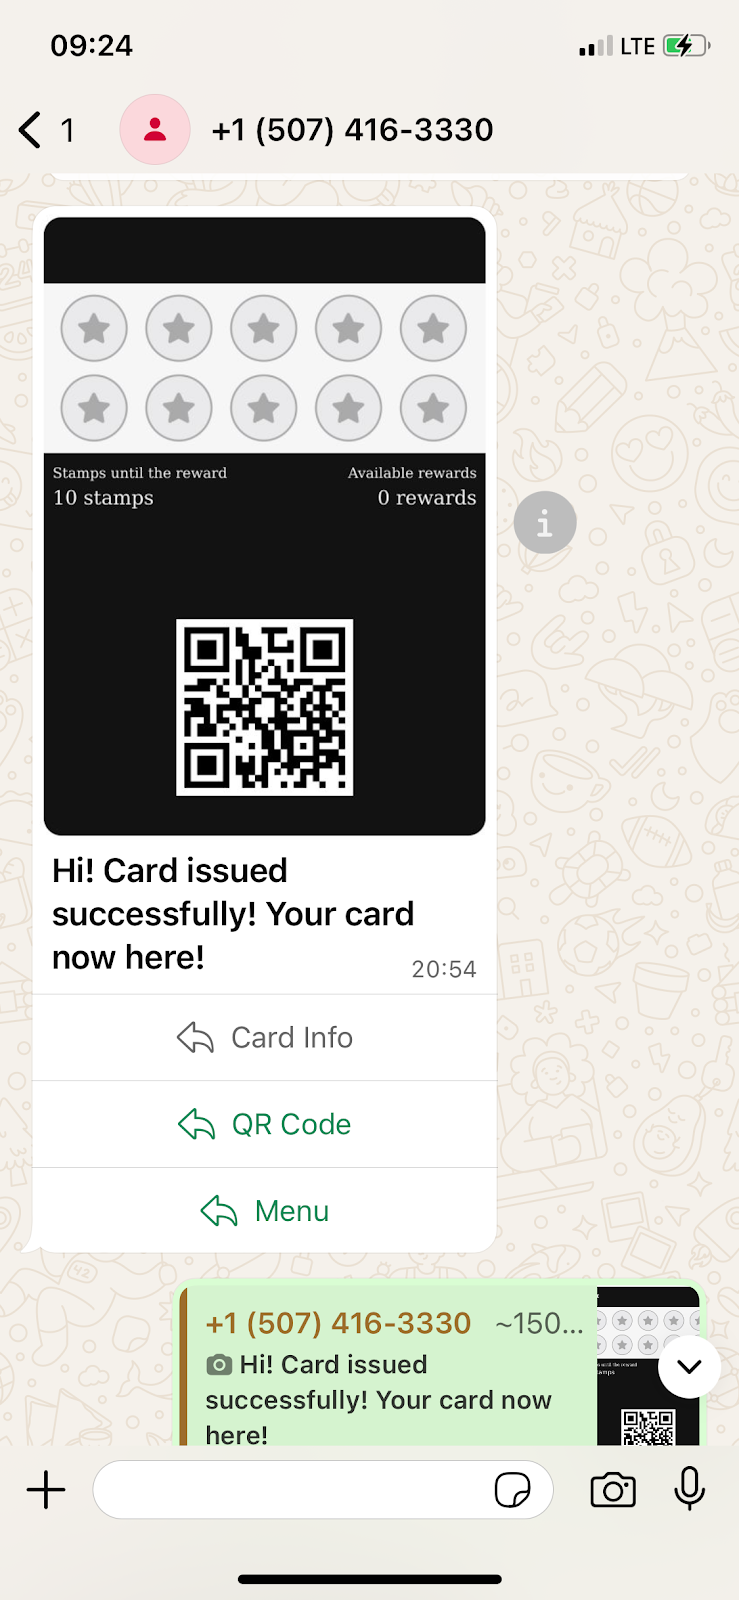
Scan the QR code of the card from your mobile phone
This opens the card issuing form in your mobile phone. Here, enter the required details in this case first name and phone number then click ‘Install in WhatsApp’
Once the installation is complete and the integration is added to WhatsApp, you will receive a confirmation message indicating that the setup was successful.

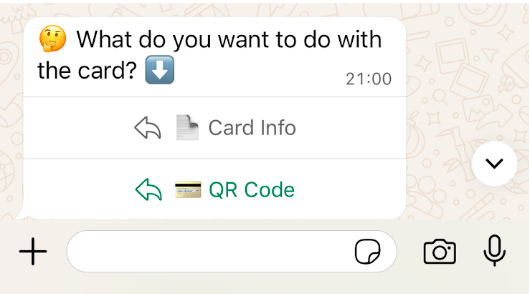
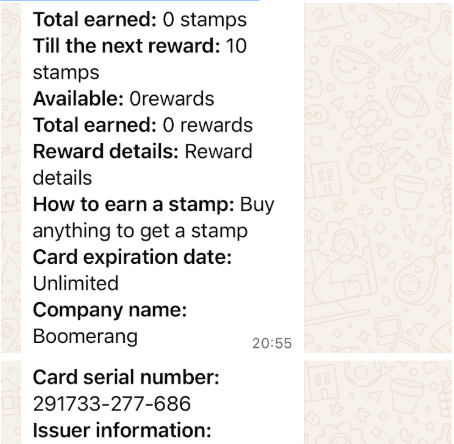
When you click on “Card Info“ this displays the balance, reward, company name, card expiration date, serial number,etc.
When a customer taps the “QR Code“, it simply opens the QR code in fullscreen so the business can scan it.
If you have other cards installed, tapping “Menu“ gives you the option to choose another card.
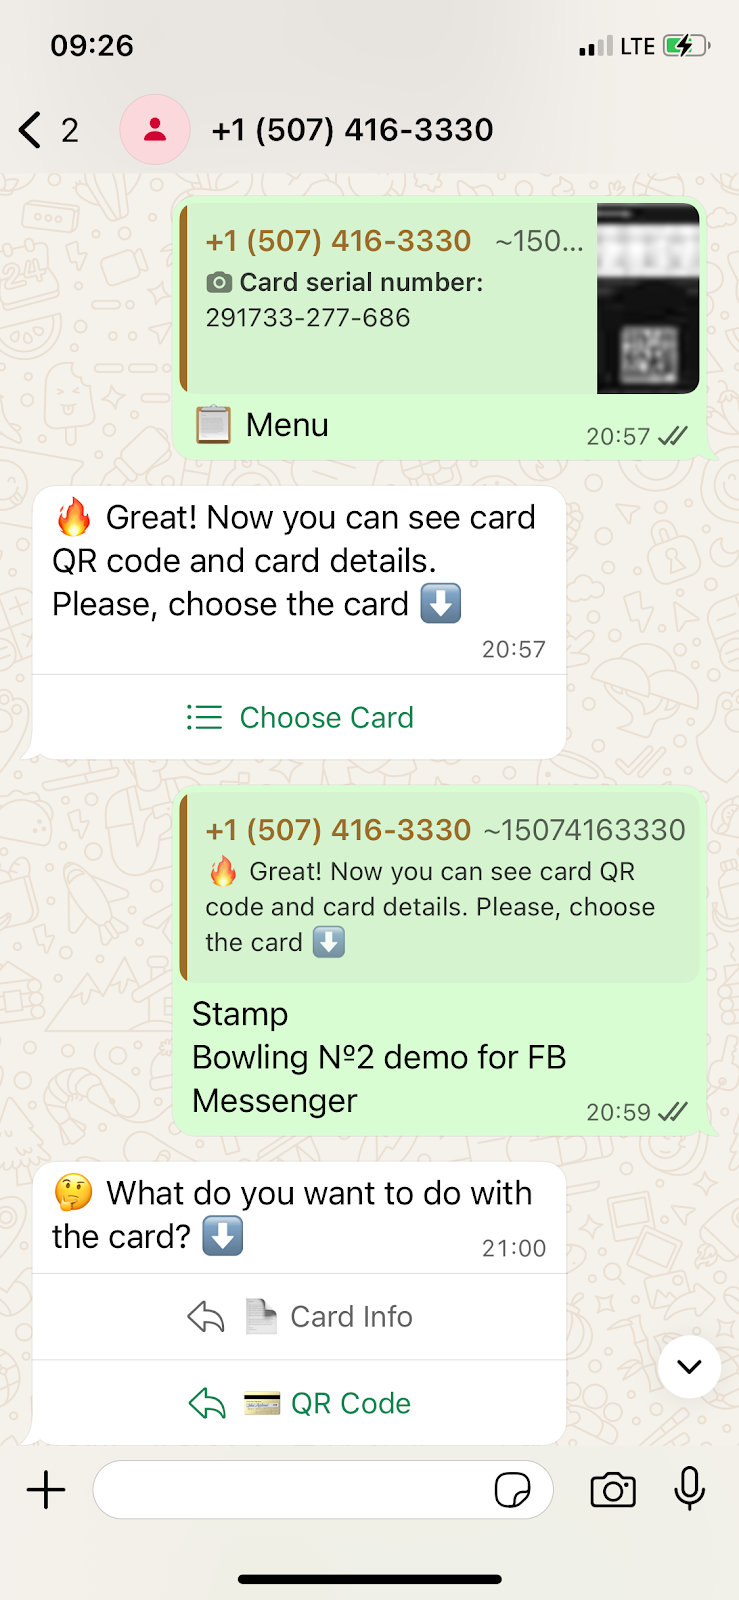
You will be presented with a list of all the cards you’ve installed, allowing you to choose any one of them.
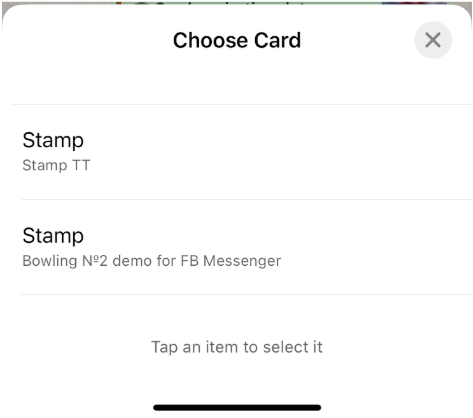
Once a card is selected, the system will request the information needed for that specific card.