✴️ Stamp
How to create a stamp card in Digital Wallet
VIDEO COMING SOON
1. Upon successful login, navigate to the left-hand menu.
2. From the list of modules, click the
icon. Doing so opens the Cards module.

3. Here, you can either create a card using a template from a list of a wide range of pre-loaded templates or create one from scratch. To develop a better understanding, we will take a look at card creation from scratch.
4. To do so, click the “From scratch“ button.

5. This initiates the stamp card creation workflow. A card is created by filling in the details in 5 sections that include Card Type, Settings, Design, Information, and Save and preview. Let us take a look at how each section works.
Card Type
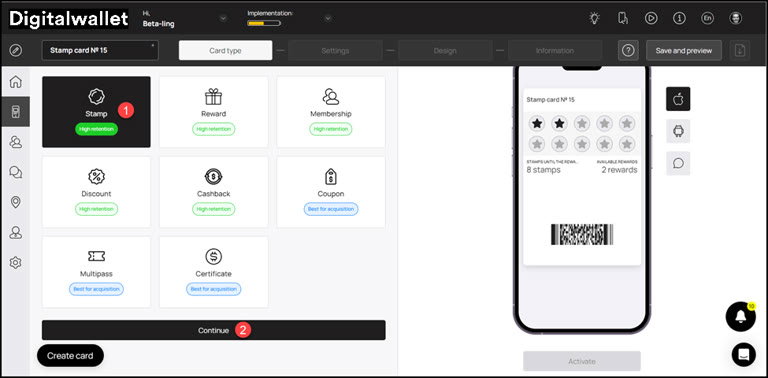
1. This is the first section. Here, you make a selection regarding the type of card you want to create.
2. From the available card types, click Stamp.
3. Once selected, click the Continue button. As a result, you land on the Settings section.
Settings
1. Here, choose the language in which you want to create the stamp card using the Language dropdown.
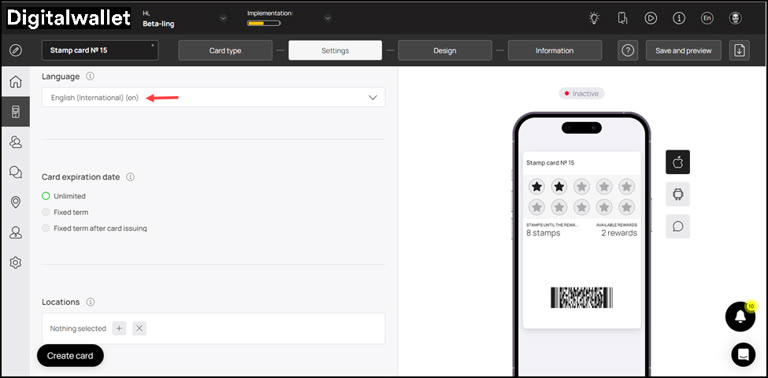
2. Select the expiration date for the stamp card using the radio buttons under the Card Expiration Date heading.
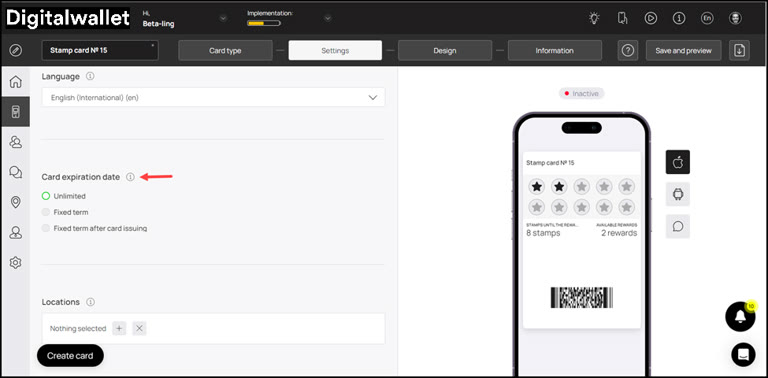
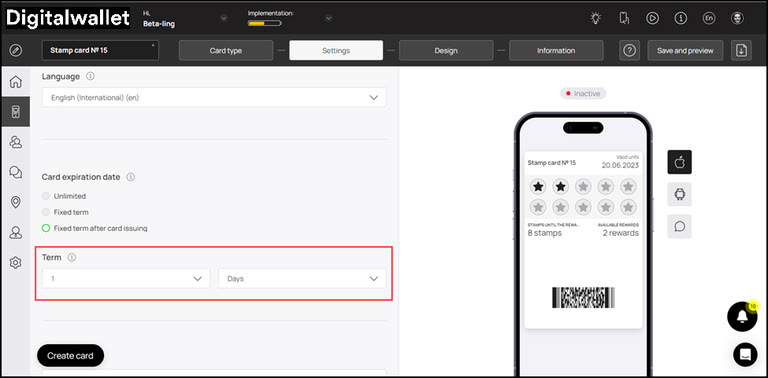
3. It is recommended to select Fixed term after card issuing from here. As this option is selected, the Term dropdowns are displayed. Here, you can select the number of days upon card activation after which it expires.
4. Similarly, select the stamp validity using the radio buttons under Stamp Life heading. In case you choose Fixed term after stamp earned, the Term dropdowns are displayed.
5. Here, you can define the number of days for which a stamp remains valid after it is earned.
6. Set the location(s) of your business where the card can be used from the Locations field. Multiple selections can be made from here.

7. Next up is the Card Issuing Form heading. Here, you can define the fields you want to include on the stamp card.
8. Use the Field Type dropdown to select the type of field you are adding.

9. Similarly, enter the name of the field in the Field Name text field.
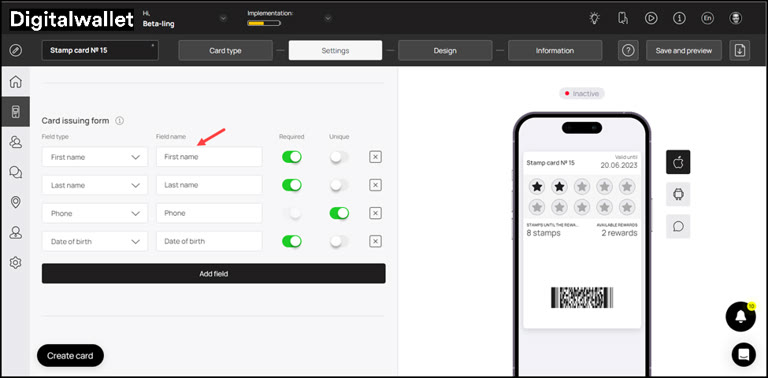
10. In case you want to make a field mandatory, enable the Required toggle.

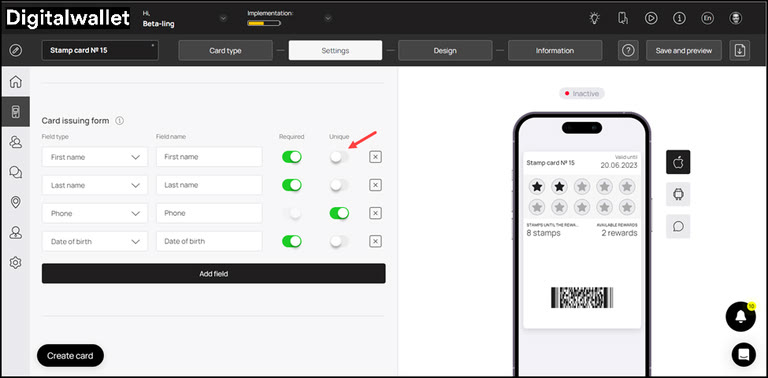
11. Similarly, if you want to record unique data in a field, enable the Unique toggle.
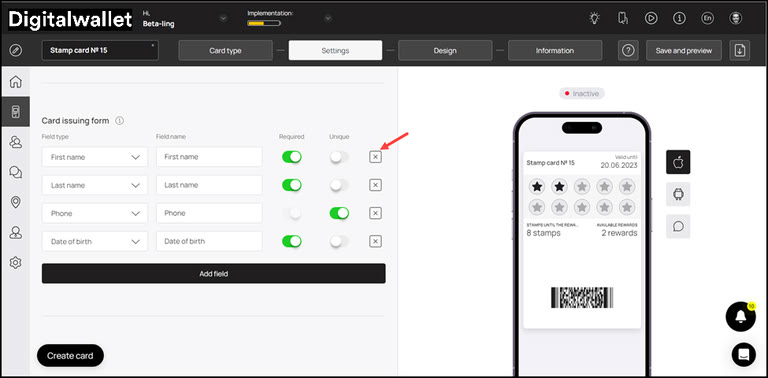
12. In case you want to remove a field, click the X button.
13. Similarly, if you want to create a new field, click the “Add Field“ button. This adds a new field from where you can select the field type and enter the name of the field for it to be added on the card.

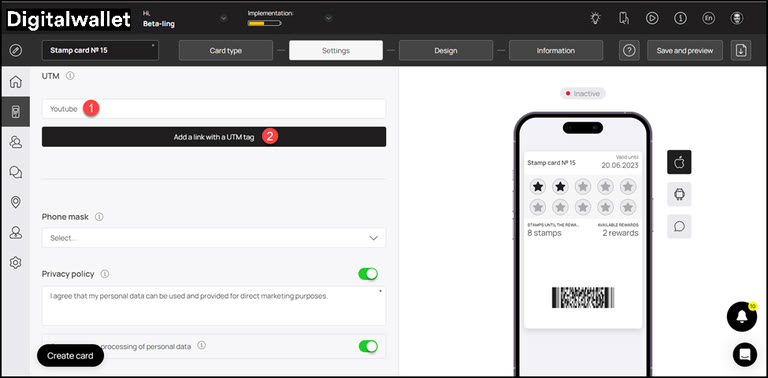
14. This is followed by the UTM field. Here, you can create a channel link for the analytics to be tracked of the traffic generated by that channel. For instance, if you add Facebook in this field, Digital Wallet will generate a URL automatically associated to a UTM tag.
15. Use the Source Name to record the name of the channel.
16. Once entered, click the Add a link with UTM Tag button.
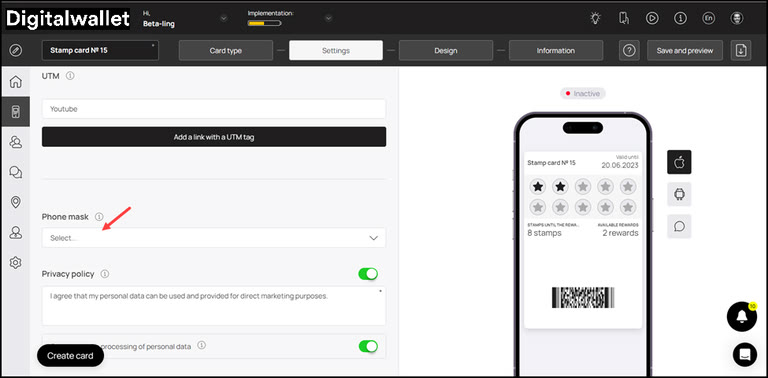
17. Moving forward, the Phone Mask dropdown lets you choose a region via which you want to mask the communication calls.
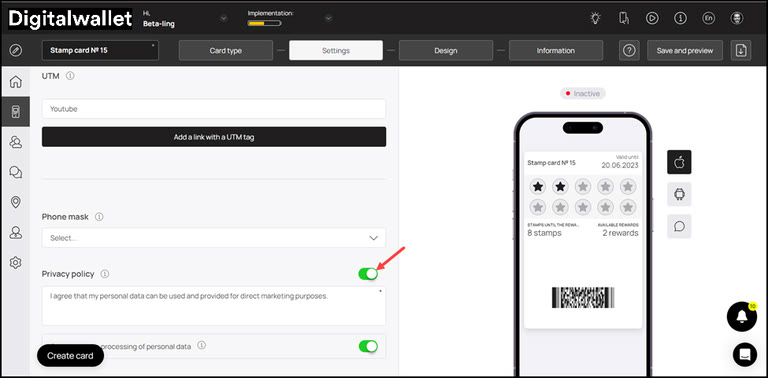
18. In case you want to include the privacy policy on the card, enable the toggle button next to the Privacy Policy heading. Moreover, you can also edit the privacy policy using the field below the heading.

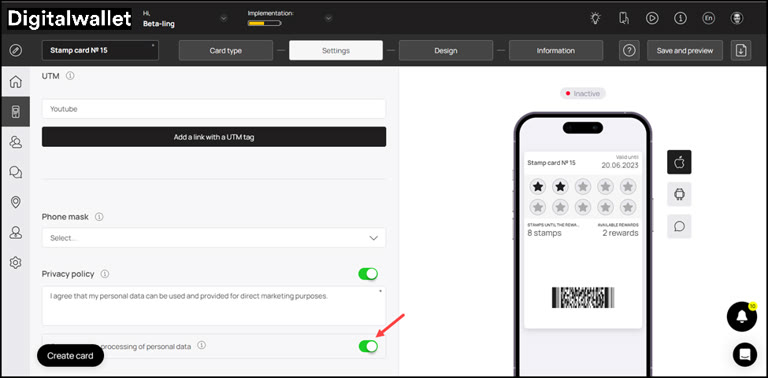
19. In case you want to include consent while processing personal information of the user, enable the toggle button next to Consent to the processing of personal data heading.
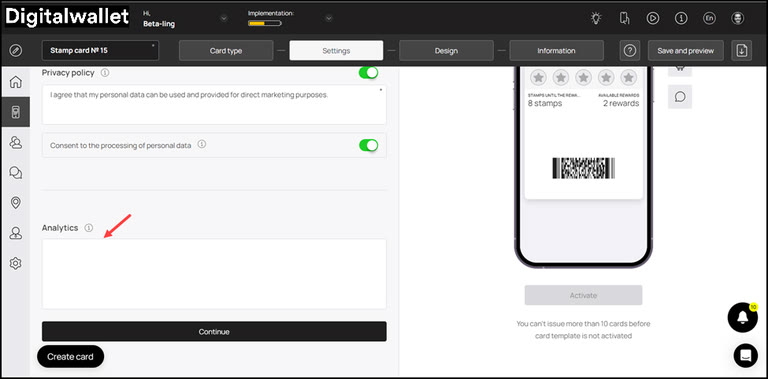
20. If you want to include a customized script for analytics, you can include this script in the Analytics field.
21. Once the required fields are filled, click the Continue button. This takes you to the Design section.
Design
1. This section lets you configure the design of the stamp card.
2. Starting off, choose the number of stamps at which the reward can be redeemed from the Stamp Count heading.
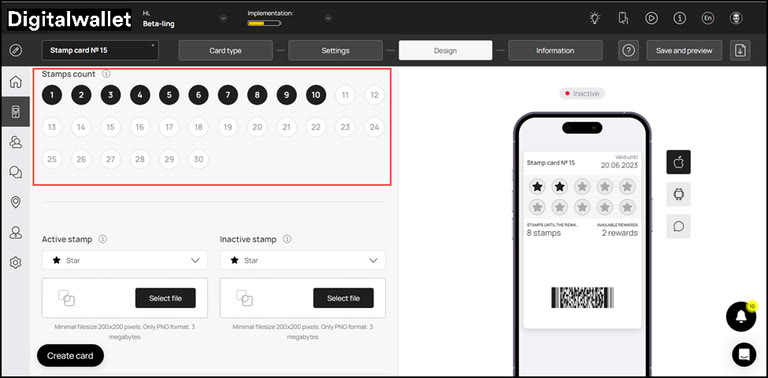
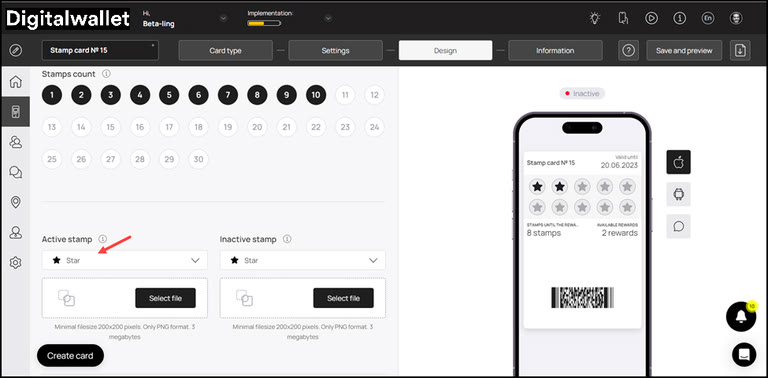
3. Use the Active Stamp dropdown to select the icon for representing how the active stamp would appear.
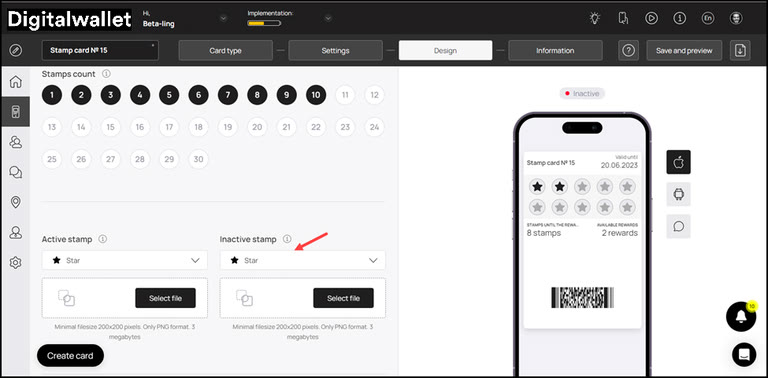
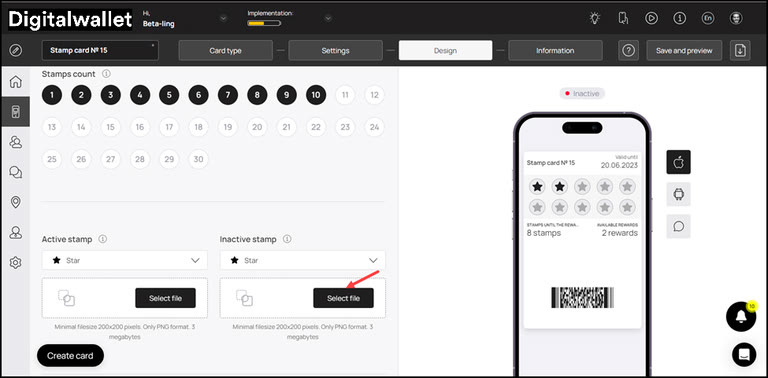
4. Similarly, use the Inactive Stamp dropdown to choose the icon representing an inactive stamp.
5. In case you want to upload an icon from your system storage for an active stamp, click the Select File button under the Active Stamp dropdown.
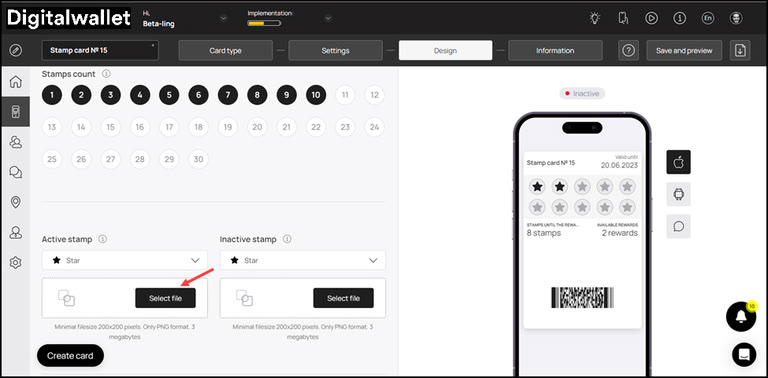
6. Similarly, clicking the Select File button under the Inactive Stamp dropdown lets you choose an icon for inactive stamp from your system storage.
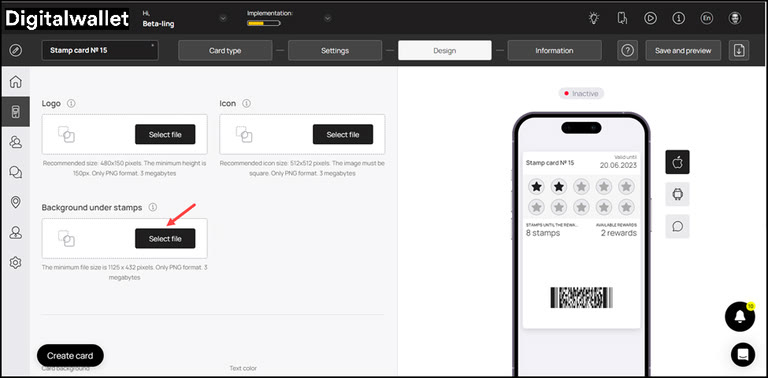
7. Click the Select File button from the Logo heading to choose a logo to be displayed on the card and on the release form from your system storage.
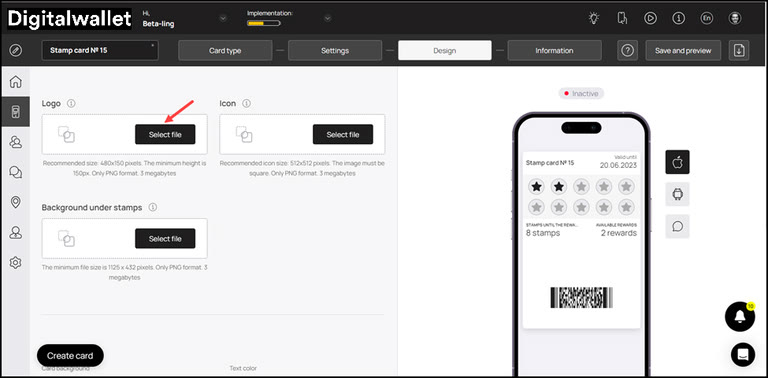
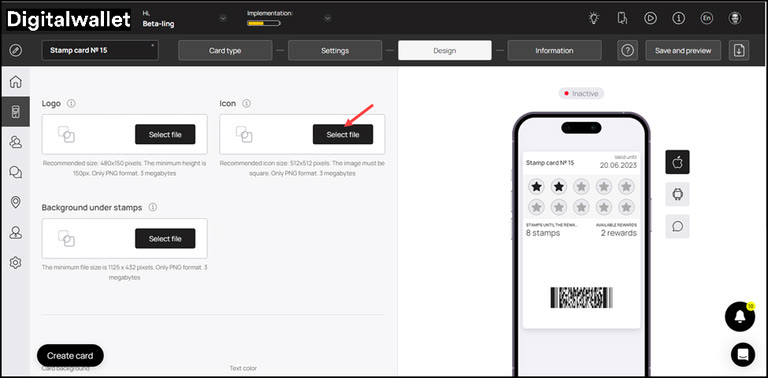
8. Similarly, click the Select File button from the Icon heading to choose an icon from your system storage to be displayed in the push messages.
9. Choose an icon from your system storage for the background under the stamps by clicking the Select File button under the Background under stamps heading.
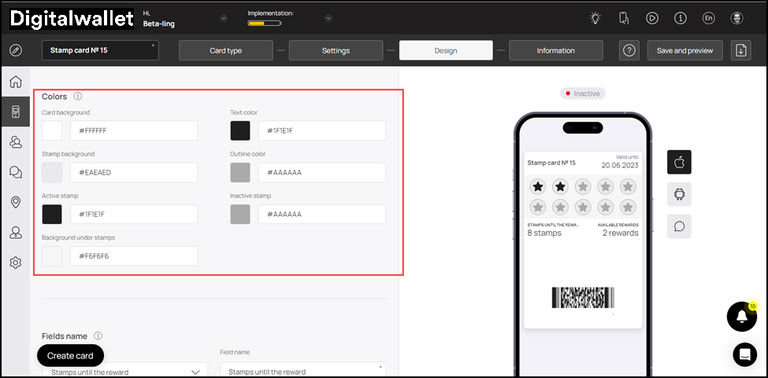
10. From the Colors section, you can set the colors for Card Background, Text Color, Stamp Background, Outline Color, Active Stamp, Inactive Stamp, and Background under stamp.
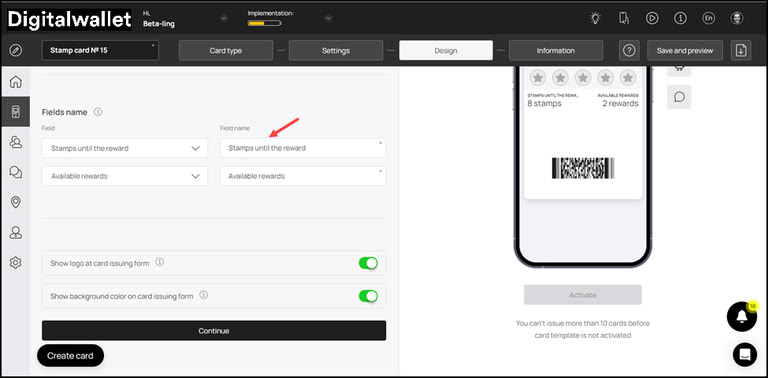
11. From the Fields Name heading, you can use the Field dropdown to select the type of field that appears on the card.
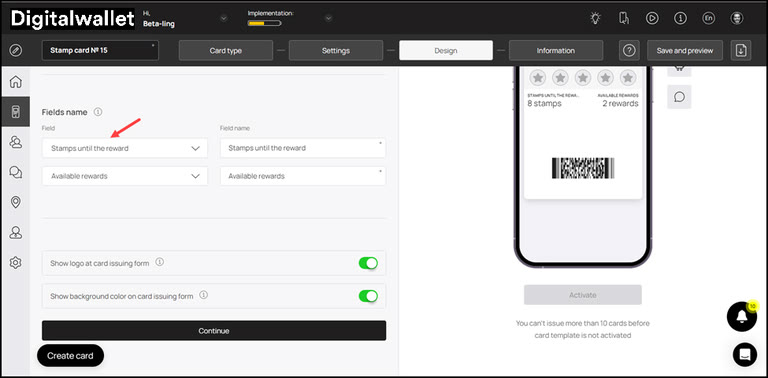
12. Similarly, the Field Name field allows you to enter what text appears on the card in the defined field.
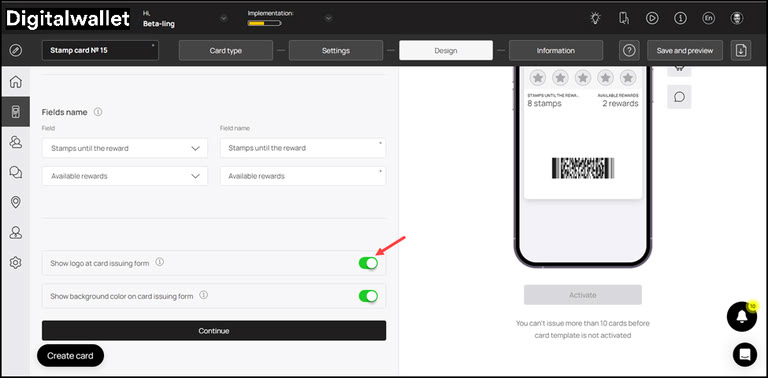
13. In case you want the logo to appear on the Card Issuing Form, enable the Show logo at card issuing form toggle button.
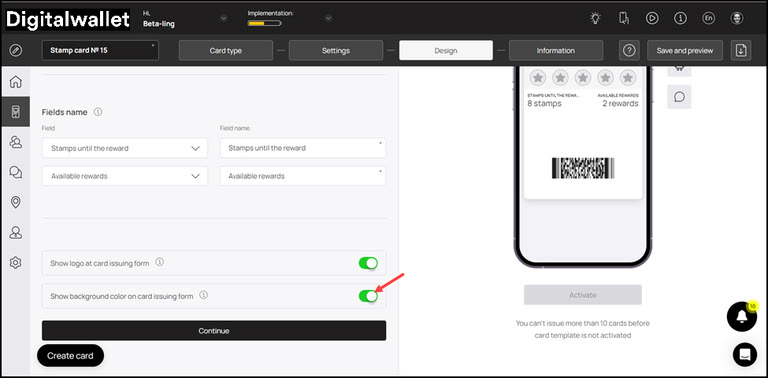
14. Similarly, enable the Show background color on card issuing form toggle button in case you want the background color to appear on the card issuing form.
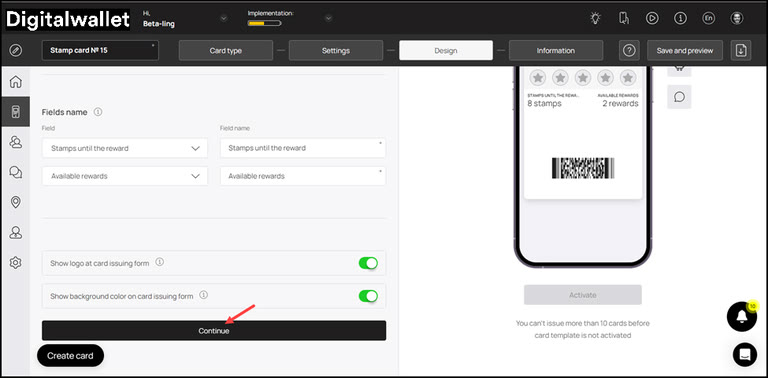
15. Once all the selections are made, click the Continue button. Resultantly, you land on the Information section.
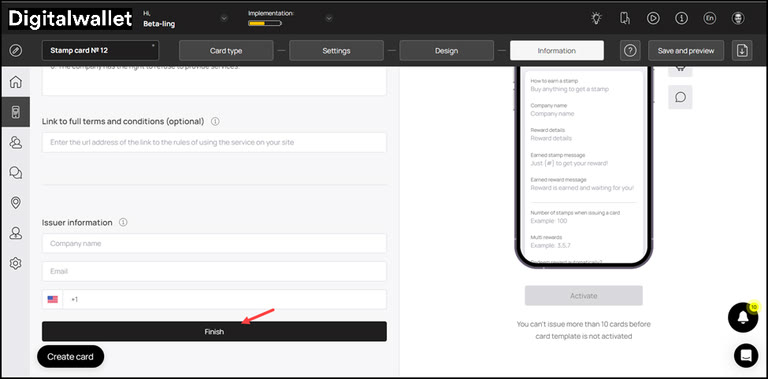
Information
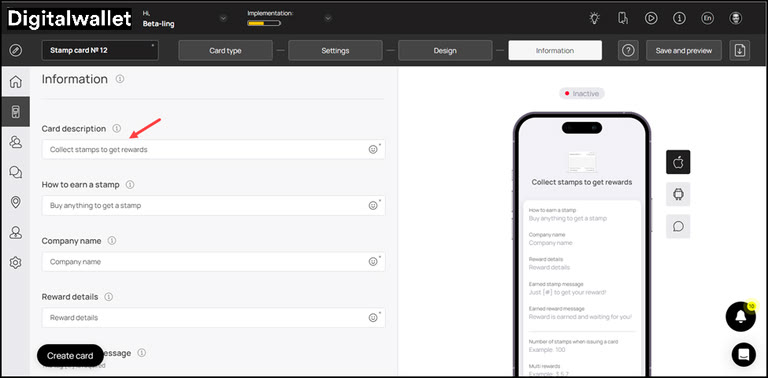
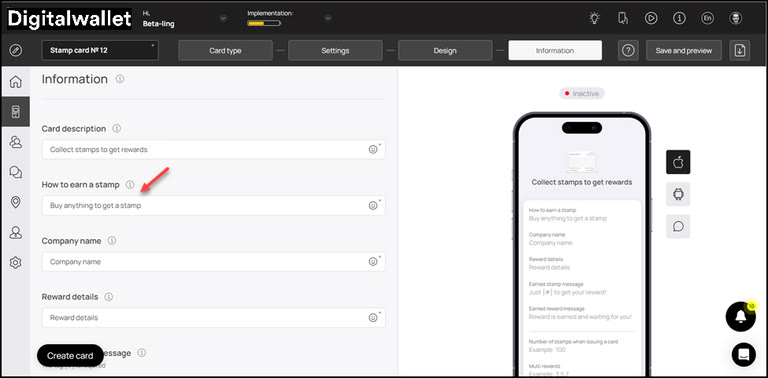
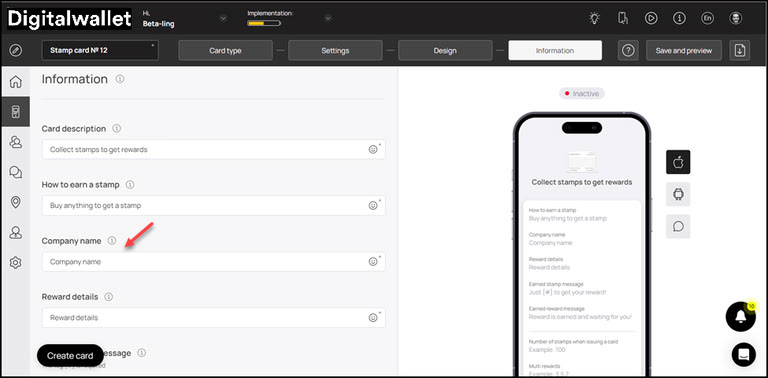
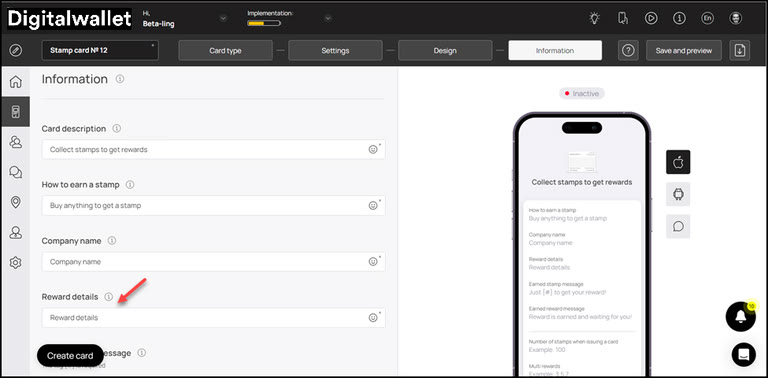
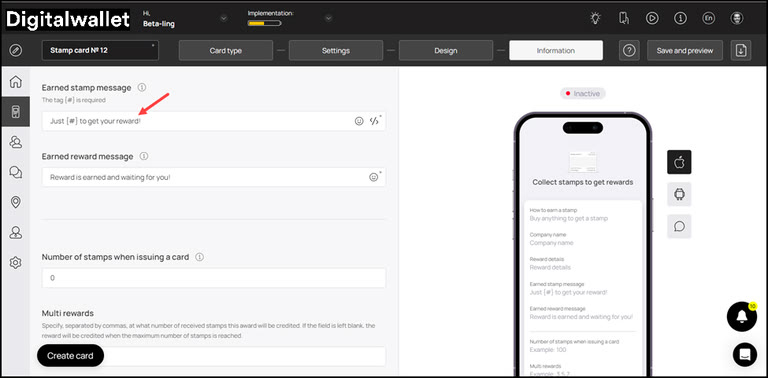
1. This section lets you fill relevant information in the card. The impact of each field can be viewed in the mobile screen preview displayed on the right side of the screen.
2. Use the Card Description field to enter a short description of the card.
3. Use the How to earn a stamp to define how a customer would earn a stamp.
4. Use the Company Name field to enter the name of your business.
5. Enter the details of the reward using the Reward Details field.
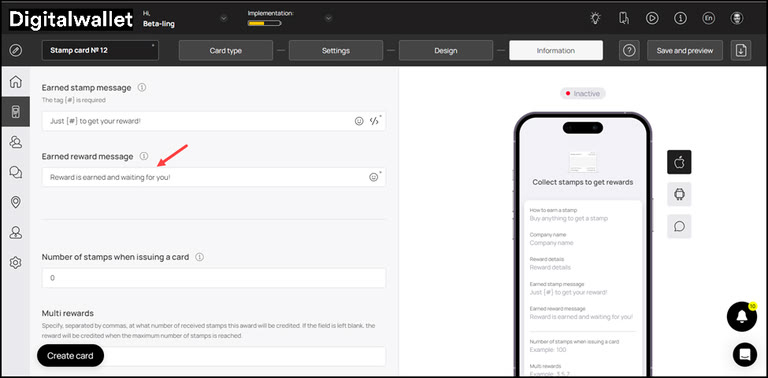
6. Use the Earned Stamp Message field to enter the message to be displayed when customer earns a stamp.
7. Similarly, enter the message to be displayed when customer earns a reward using the Earned reward message field.
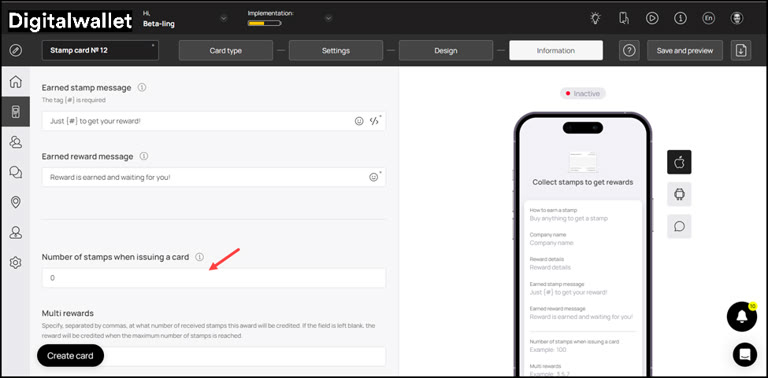
8. Moving further, define the number of stamps a customer should earn for a card to be issued using the Number of stamps when issuing a card field.
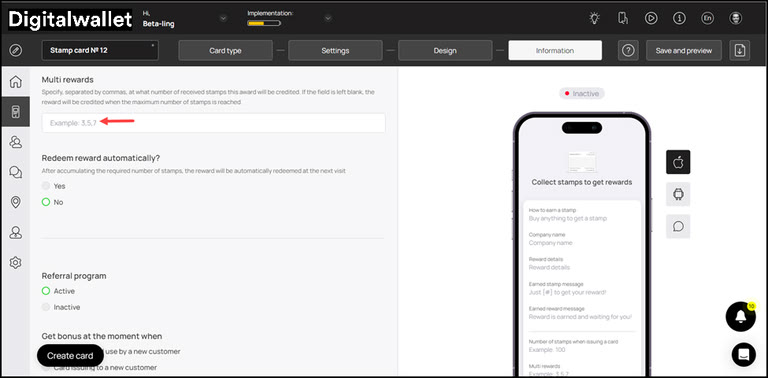
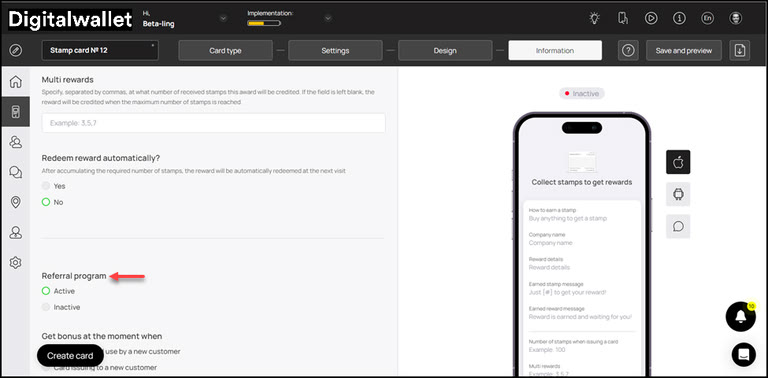
9. Use the Multi Rewards field to enter the number of stamps separated by a comma (3,6,9) to issue multiple rewards on a defined number of earned stamps.
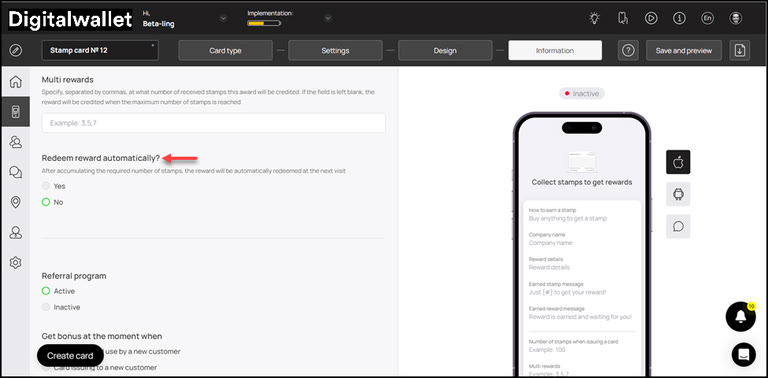
10. In case you want the earned rewards to be redeemed automatically, select Yes from the Redeem Rewards Automatically? heading.
11. Choose whether you want to activate the referral program using the Active and Inactive radio buttons under the Referral Program heading.
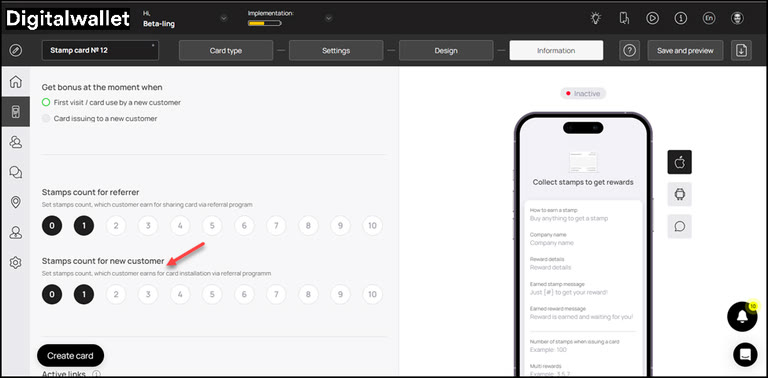
12. Define when the bonus is issued to a customer from the options available under the Get bonus at the moment when heading.

13. Choose how many stamps a customer earns upon sharing their card via the referral program using the Stamps count for referrer heading.
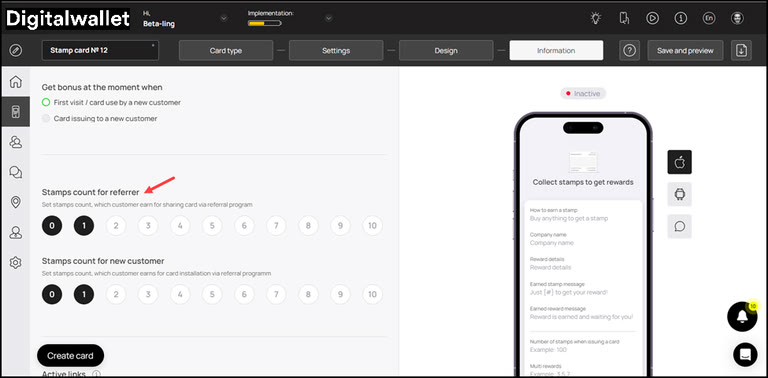
14. Similarly, choose the number of steps a new customer earns upon registering via the referral program using the count icons under the Stamps count for new customer heading.
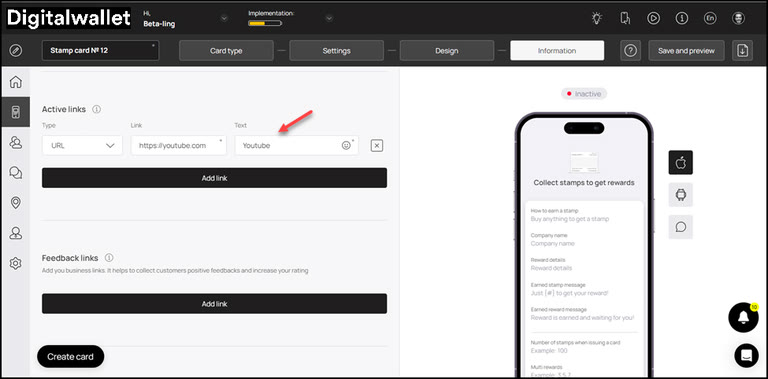
15. From the Active Links heading, choose the type of link you want to include on the card using the Type dropdown. The available options include URL, Phone, Email, and Address.
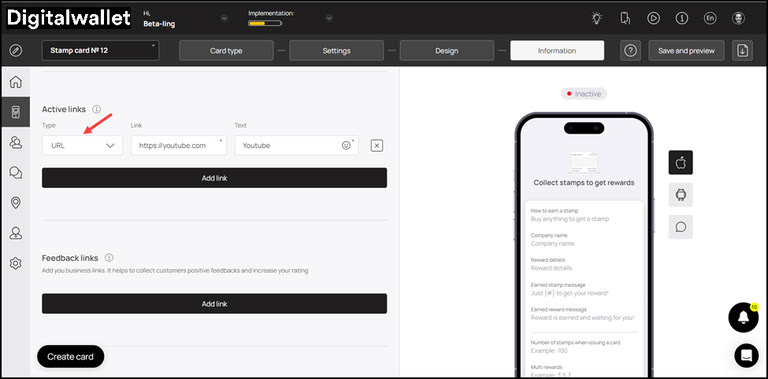
16. Enter the website URL in the Link field.

17. Enter the text to appear on the card using the Text field.
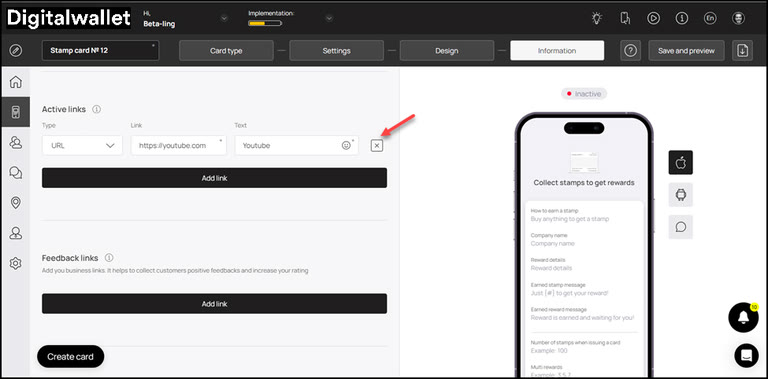
18. To remove an active link, click the X button.
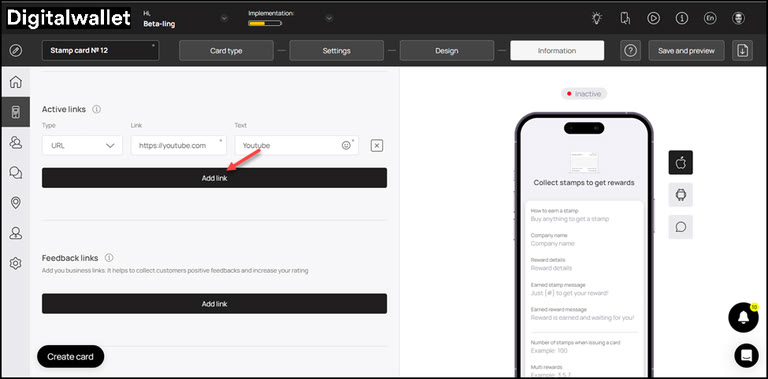
19. To add another link, click the Add Link button. This adds a new row for another link to be recorded.
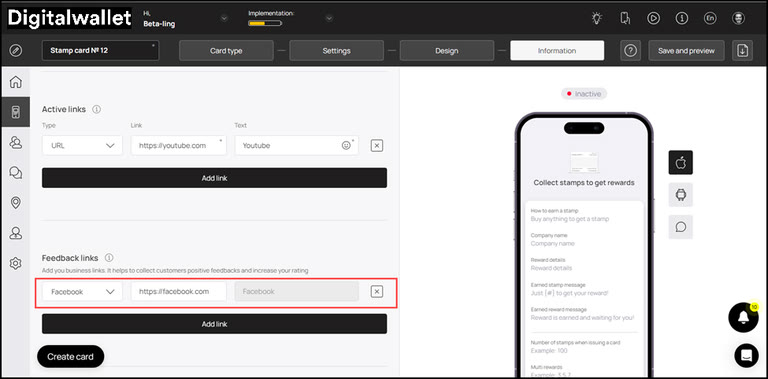
20. Similarly, use the link type dropdown and link fields under the Feedback Links heading to add your business links for the customer reviews to be recorded.
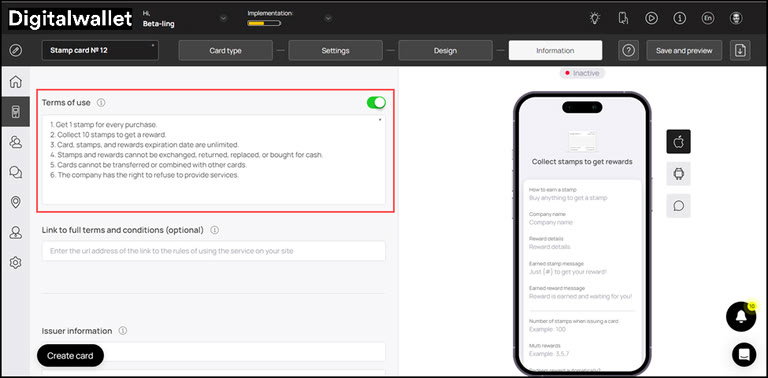
21. In case you want to include Terms of use on the card, enable the toggle button next to Terms of Use heading.
22. Enter any terms of use you want to include on the card using the Terms of Use field.
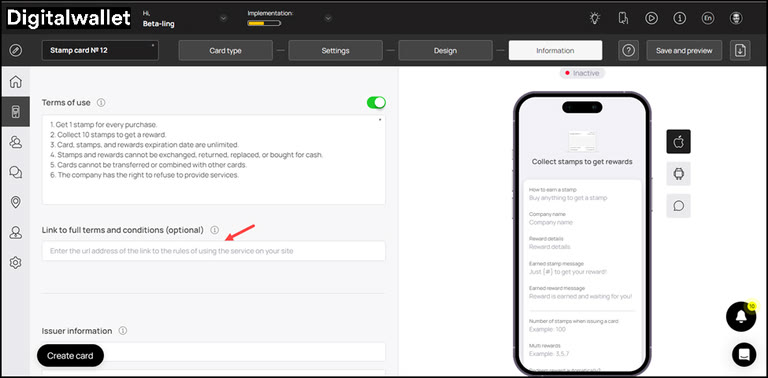
23. Use the Link to full terms and conditions field to provide a link to the complete T&Cs of your business.
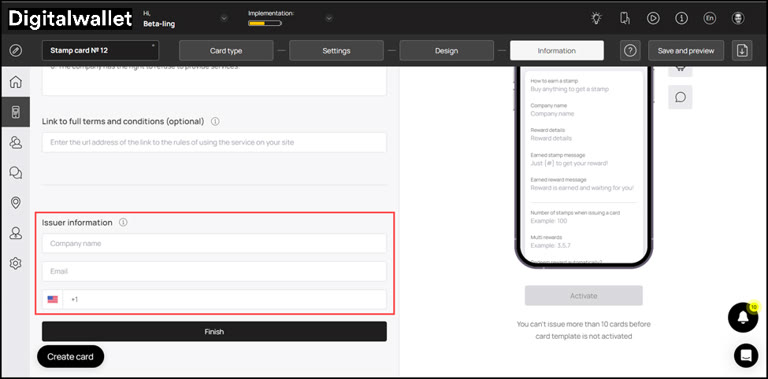
24. Use the Company Name, Email, and Contact Number fields under the Issuer Information heading to record the card issuer details to be displayed at the back of the card.
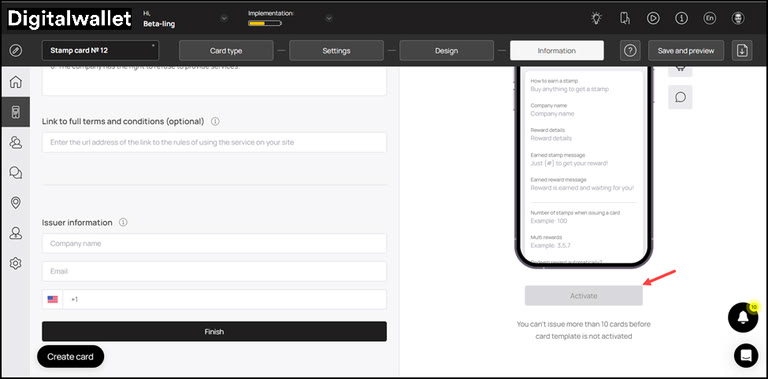
25. To activate the template, click the Activate button under the card preview.
26. Once the details are recorded, click the Finish button.
Save & Preview
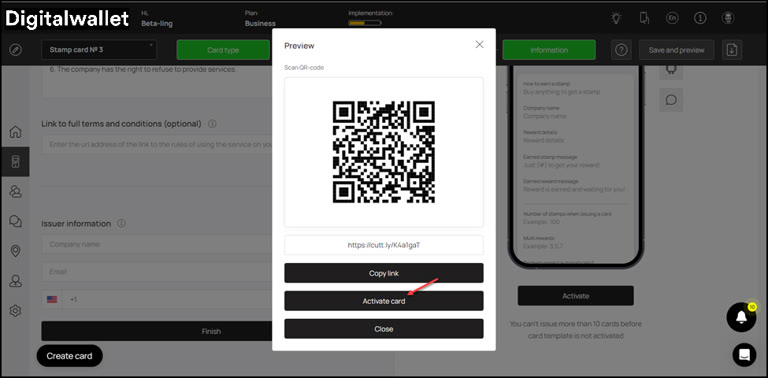
1. As the Finish button is clicked, the Preview popup is displayed.
2. From here, you can scan the QR code of the card.
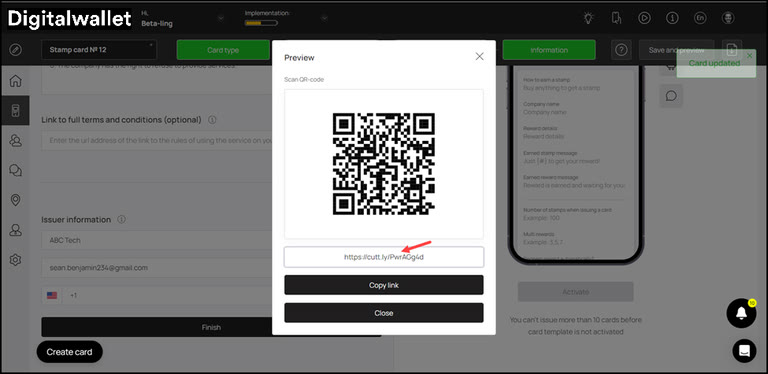
3. To copy the link of the car, click the Copy link button.

4. Click the Activate Card button to activate the card.