

✅ Quick Win #3: Importing existing customers and issuing loyalty cards
How to Import Your Existing Customer Base and Issue Loyalty Cards
If you already have a customer list, you do not need to add people one by one. You can bring your existing database into the platform, import those contacts in bulk, and then issue loyalty cards to them in just a few steps.
The process is straightforward. First, prepare the import file. Then upload it into the customer section. After that, open any imported customer profile and assign a loyalty card template. Once that is done, the customer will appear with a card balance and status inside their profile.
Start in the Customers Section
Everything begins inside the Customers area in the left-side menu. That is where you manage your customer base and where the import tool lives.
Inside that section, download the import template. This file gives you the structure the system expects, so it is the safest way to prepare your data correctly before uploading it.
Download and Fill the Import Template
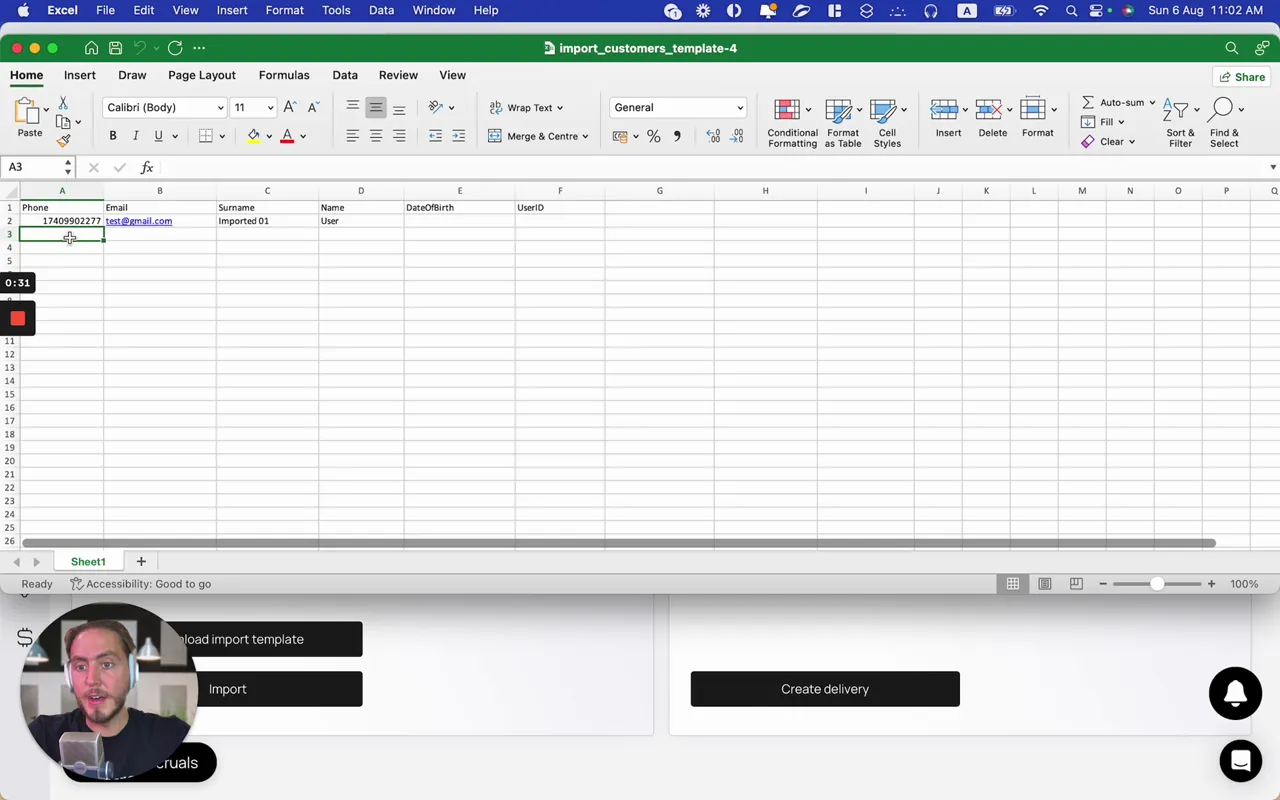
Once the template is downloaded, open it in a spreadsheet editor such as Excel and begin filling in your customer data.
You can pull this information from practically any source, as long as the data is organized properly. The important part is making sure each customer has unique personal details where required.
In particular, email addresses and phone numbers should not be duplicated when they are being used as identifiers. These fields help the platform recognize each person as a separate customer. If the same identifying data is reused, you can run into matching problems or accidental overlap.
You can also adjust the customer name field to make profiles easier to recognize later. That is especially helpful if you are importing a large list and want clean, readable customer records after the upload.
After entering the data, save the file in the spreadsheet format used by the template and close it before importing.
Import the File
With the file ready, return to the customer section and use the Import button.
The basic flow looks like this:
Click Import
Select your completed file
Choose the correct template
Confirm the import
If everything is formatted correctly, the system will complete the upload and show a successful import message.
Check the Newly Imported Customer
After the import finishes, the new customer record will appear in your customer base. At that point, the contact exists in the system, but that does not automatically mean a digital loyalty card has already been assigned.
This is an important distinction. Importing customers adds them to your database. Issuing a card is a separate action.
So the next step is to open the imported customer profile and confirm their current status.
If you open that profile right after import, you may see that the customer has no digital loyalty cards yet. That is normal.
Issue a Loyalty Card to the Imported Customer
To assign a card, go back to the customer list or use the available actions inside the customer workflow and choose the option to issue a card.
From there, select the loyalty card template you want to use. In the example shown, a template called Burger House is selected, but the exact template depends on the loyalty program you want this customer to join.
Once the template is chosen, submit the action. The platform will then create and attach the digital loyalty card to that customer.
What the Customer Profile Looks Like After Card Issuance
After the card is issued, open the customer profile again and you should see the assigned loyalty card listed there.
In the example, the card appears with a starting balance of 50 bonus points. That balance comes from the platform's default initial accrual settings, so it is automatically added when the card is created.
This gives you an immediate way to confirm that the card was issued successfully:
The loyalty card is visible in the customer account
The program name is attached to the profile
The initial points balance is already present
Understand the Card Status
One more detail matters here. Even after the card has been created, the status may still show as Not installed.
That status means the card exists, but it has not yet been added by the customer to their device. In other words, the card has been issued on your side, but the installation step still needs to happen.
So if you see a newly issued card with points but the status says it is not installed, that is not an error. It simply means the customer still needs to receive and use the installation link.
The Full Workflow at a Glance
If you want the short version, the entire process looks like this:
Open the Customers section
Download the import template
Fill in customer data in the spreadsheet
Make sure identifiers such as email and phone are unique where needed
Save the file
Upload it through the import tool
Open the imported customer profile
Issue a loyalty card using the desired template
Confirm the starting balance and card status
Why This Matters
Bulk importing your customer base saves a huge amount of manual work. Instead of recreating existing contacts from scratch, you can move straight into activating your loyalty program for people who already know your business.
Once those customers are imported and their cards are issued, the next operational step is making sure they receive the installation link so they can actually add the digital card and start using it.